Patient Exercise Library

Core & Low-Back Exercise Resources

Review the back and trunk-control movements selected during your visit.

A reminder of movements you may have been shown in the office—not an individual exercise prescription for every visitor. Your personal care instructions come first.

Exercise pictures use AI demonstration models—not Dr. Goldstein or real patients. Follow your individual care instructions.

Before You Begin · Safety & Setup

Use a stable chair or firm comfortable surface. Floor exercises require safe transfers down and up. Progressions are options only when selected during care.

Seek assessment before exercise after significant trauma. New bowel or bladder changes, groin numbness, or weakness or numbness in both legs need emergency evaluation. Call 911 in an emergency. Severe or rapidly worsening pain needs prompt assessment.

Core / Low Back

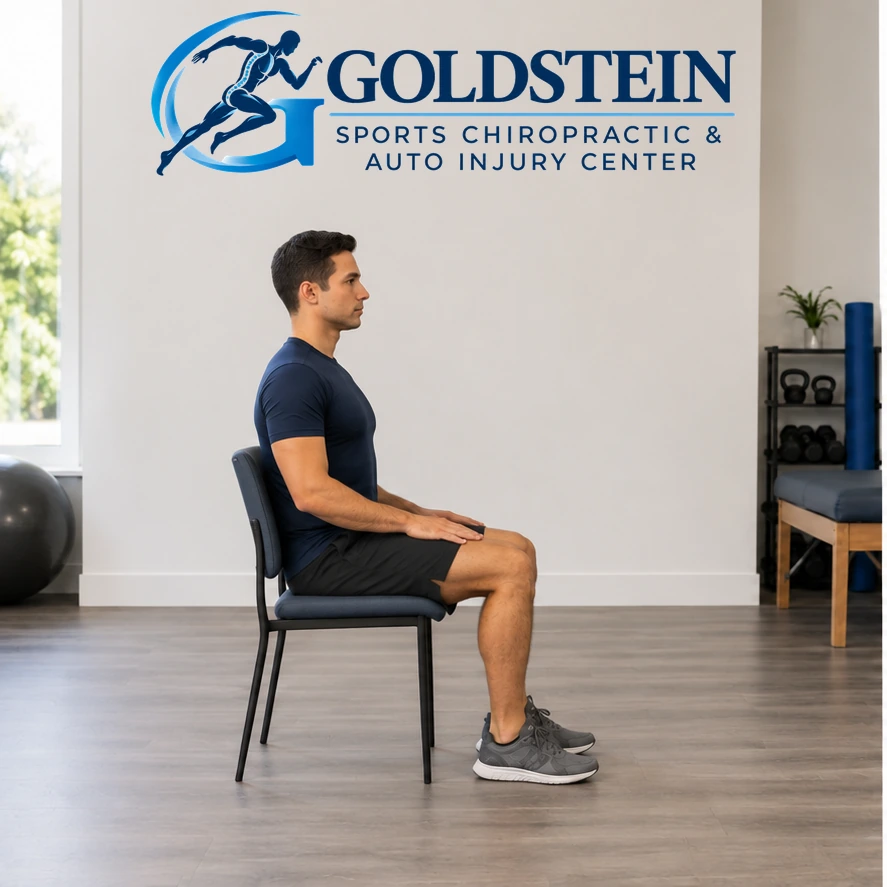
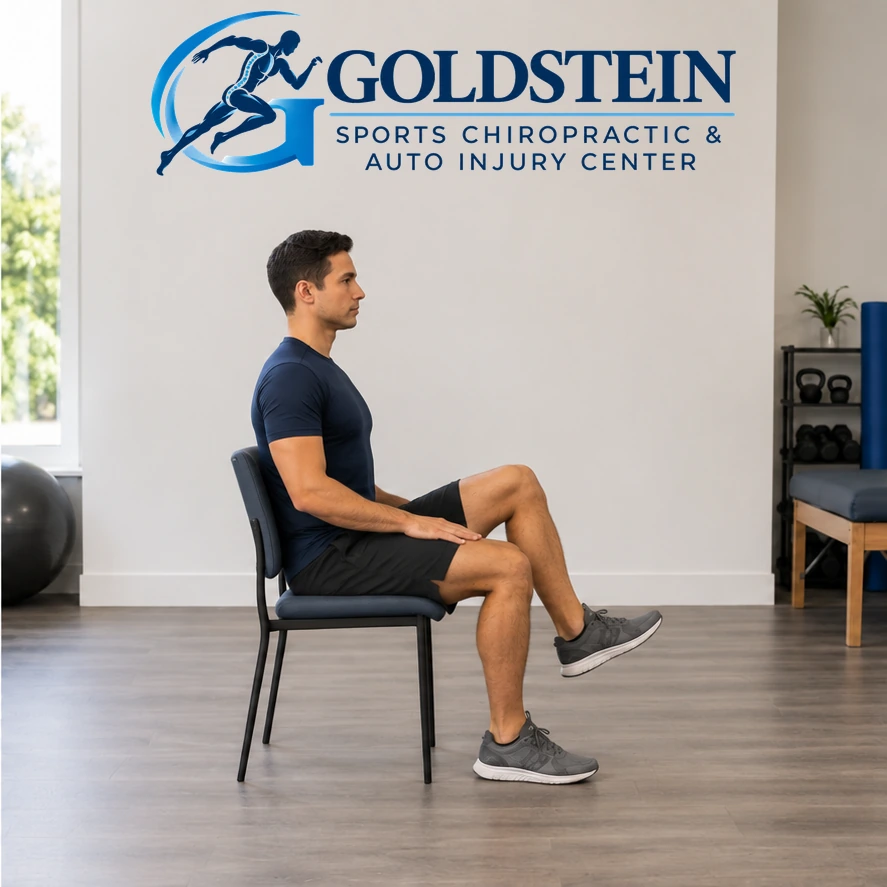
Seated Marching

Practice controlled alternating leg movement.

Sets
1
Reps
10–15 each side
Start position. Temporary AI model demonstrating Seated Marching, not Dr. Goldstein. Start and movement positions are described in the instructions.

Start position

Movement position. Temporary AI model demonstrating Seated Marching, not Dr. Goldstein. Start and movement positions are described in the instructions.

Movement position

Exercise videoComing soon

Starting Position

Sit upright in a stable chair with feet flat on the floor.

How to Do It

  1. Lift one knee toward your chest within a comfortable range.
  2. Lower the foot back down.
  3. Alternate legs, keeping the trunk controlled. Repeat on the opposite side.

What You Should Feel

Gentle effort around the hips and trunk.

Common Mistake

Avoid leaning backward to lift the knee.

Stop or Modify If

Stop if back or leg symptoms increase or sitting feels unstable.
Back to Exercise Menu

Core / Low Back

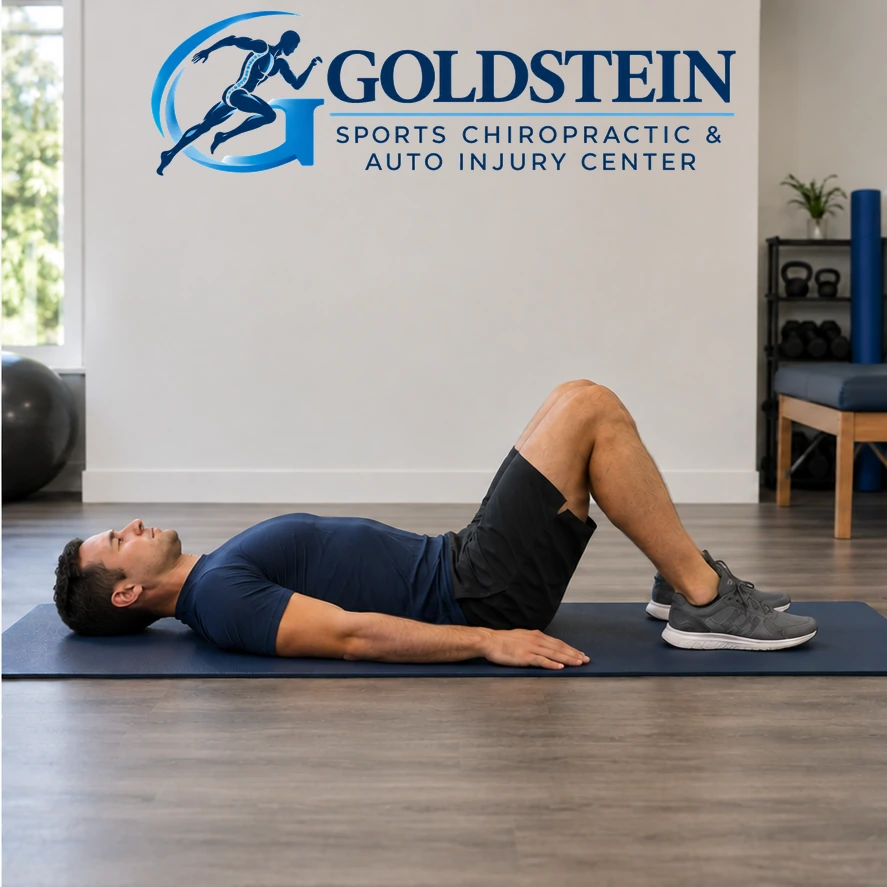
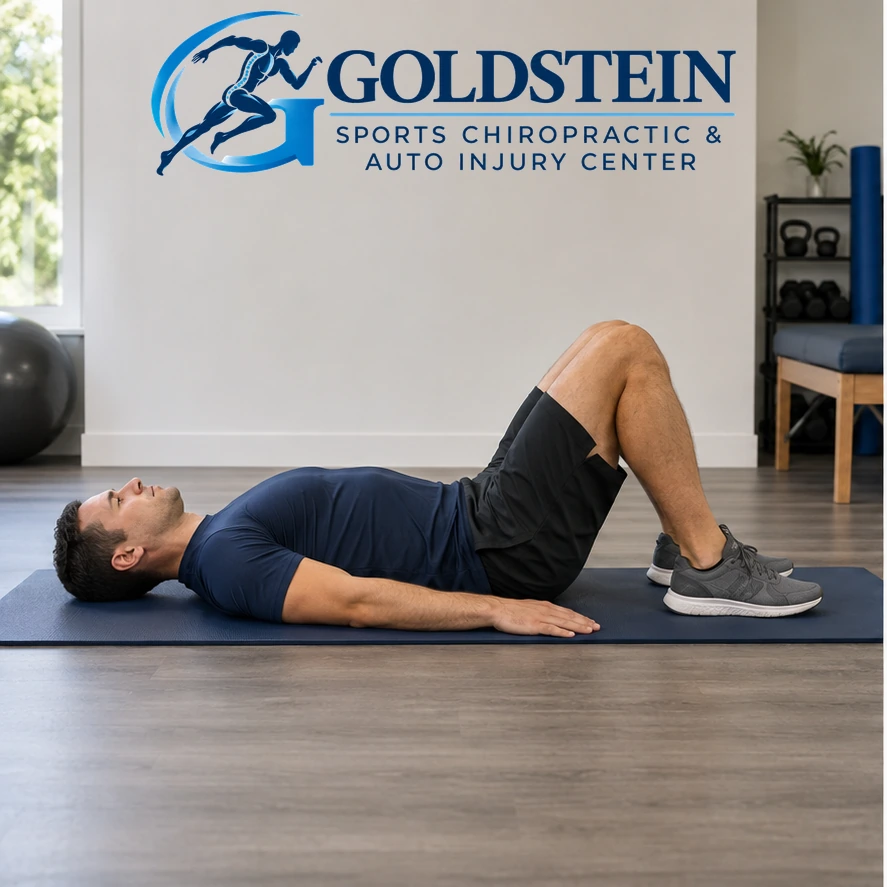
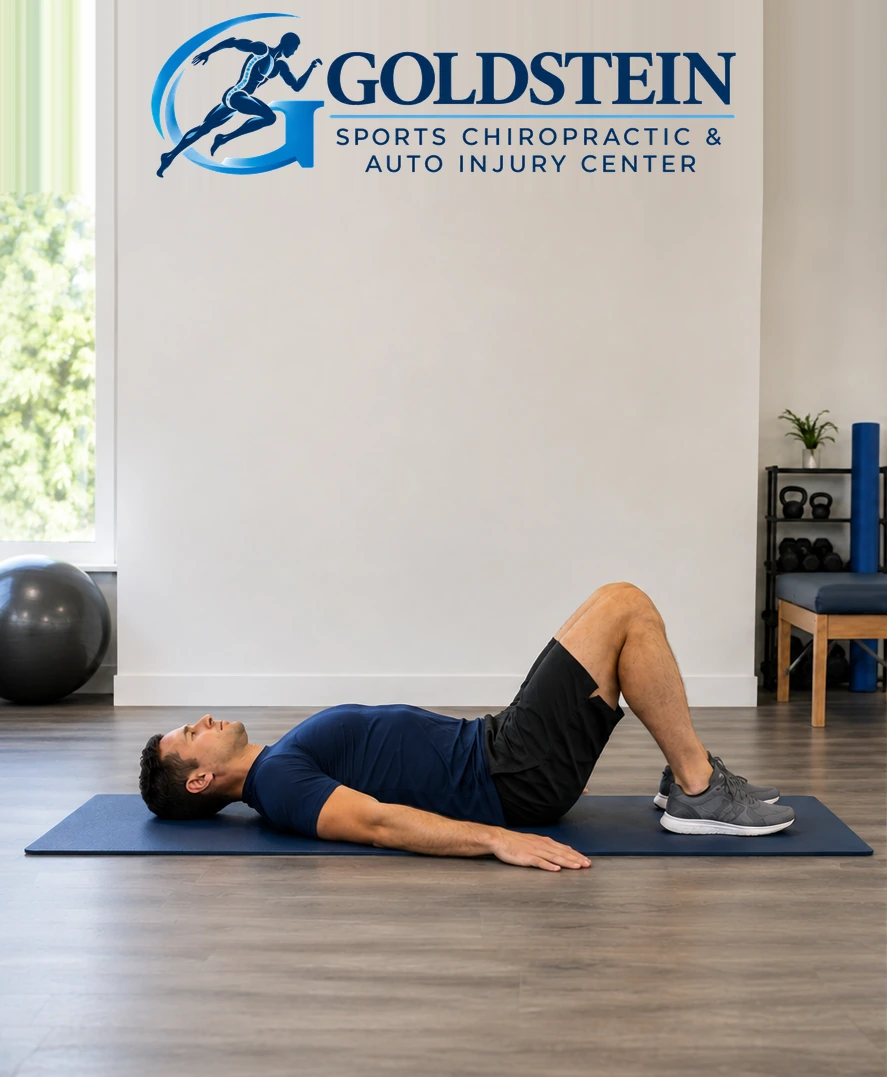
Pelvic Tilts

Practice controlled pelvic movement.

Sets
2–3
Reps
10–15
Hold
A few seconds
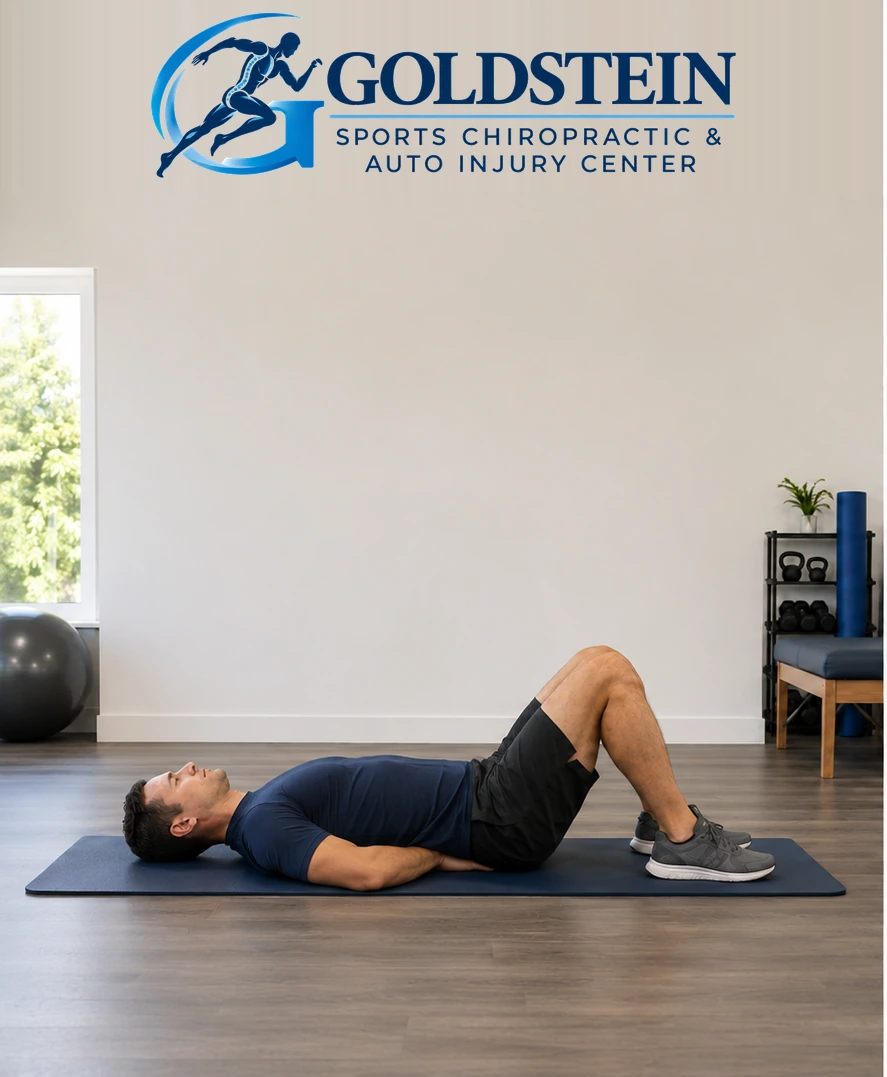
Start position. Temporary AI model demonstrating Pelvic Tilts, not Dr. Goldstein. Start and movement positions are described in the instructions.

Start position

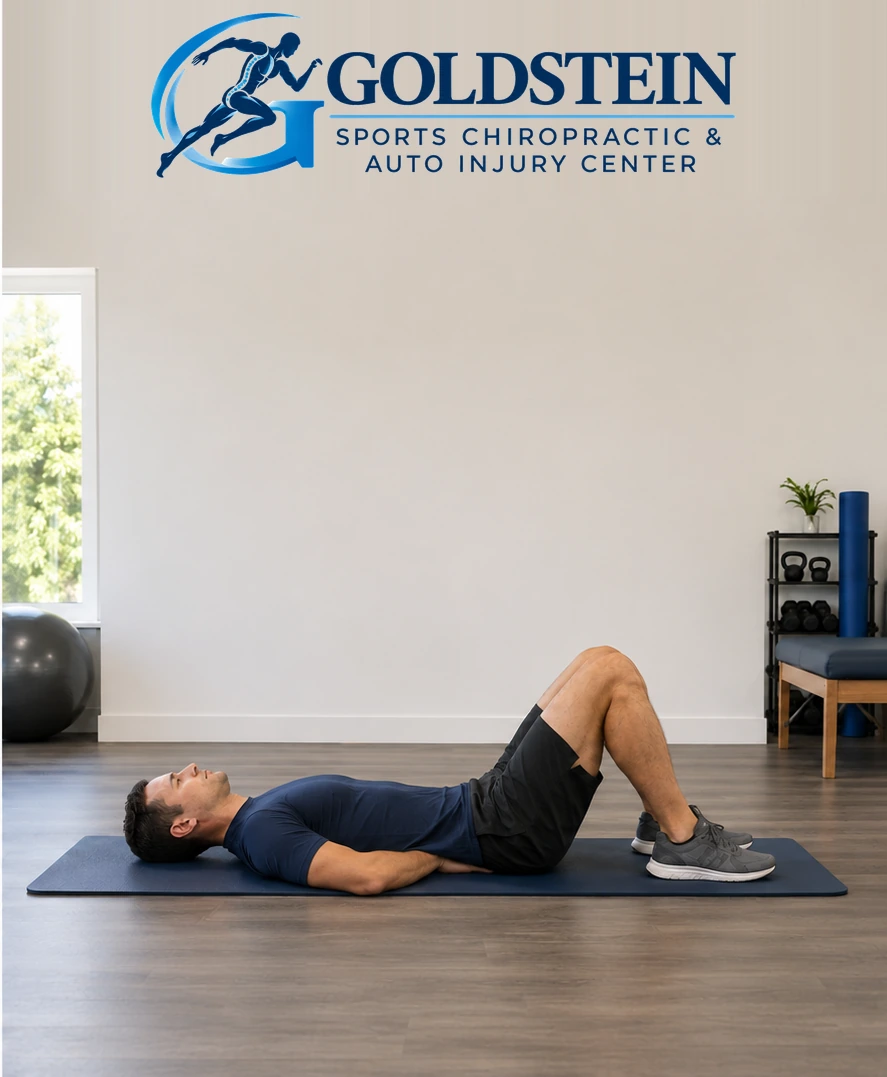
Movement position. Temporary AI model demonstrating Pelvic Tilts, not Dr. Goldstein. Start and movement positions are described in the instructions.

Movement position

Exercise videoComing soon

Starting Position

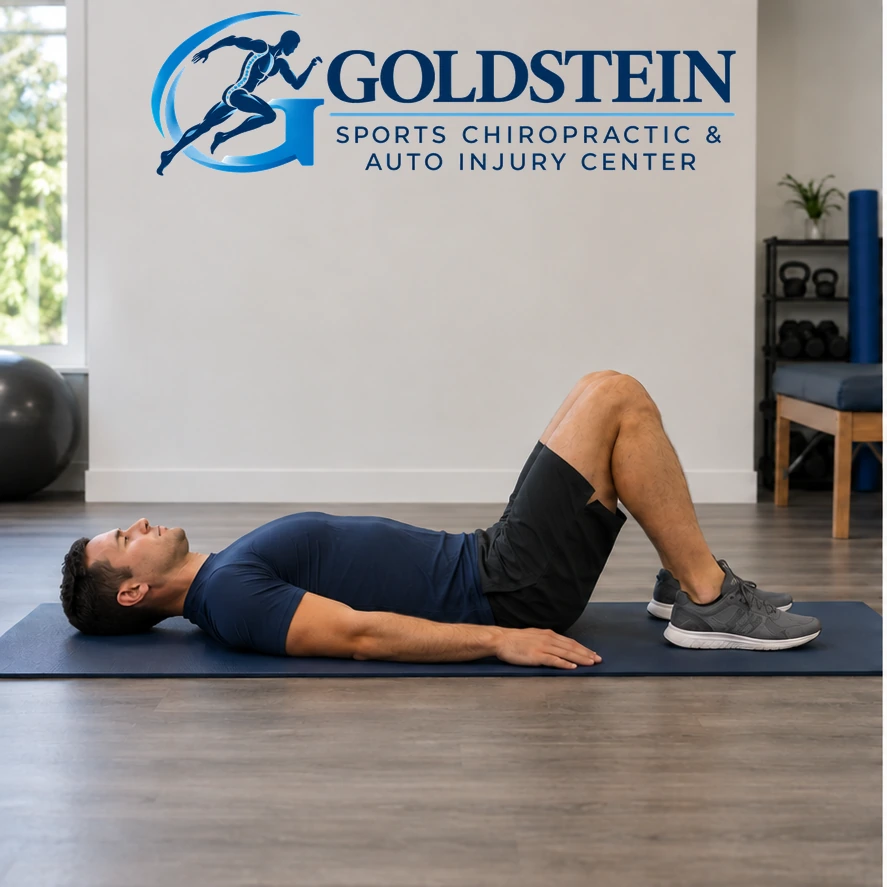
Lie on your back with knees bent and feet flat.

How to Do It

  1. Engage the abdominal muscles and gently roll the pelvis backward so the lower back moves toward the surface.
  2. Hold for a few seconds.
  3. Release without forcing the movement.

What You Should Feel

Gentle abdominal engagement and a small pelvic movement.

Common Mistake

Keep breathing normally.

Stop or Modify If

Stop if back or leg symptoms increase.

Back to Exercise Menu

Core / Low Back

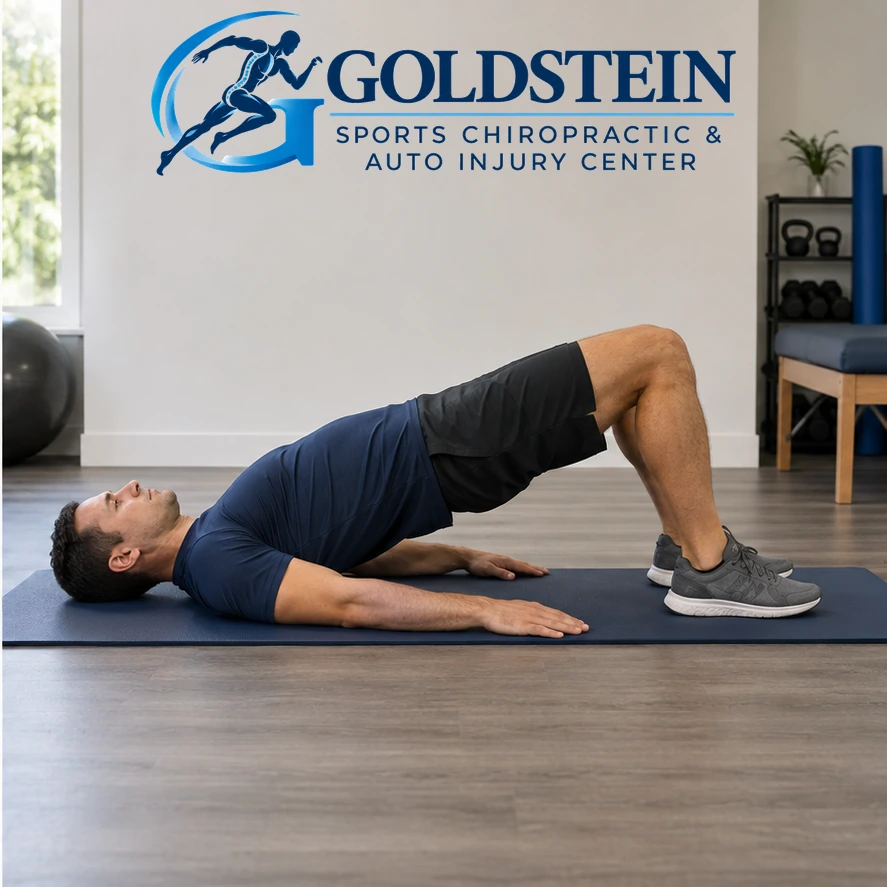
Bridge

Practice a controlled hip lift.

Sets
2–3
Reps
10–12
Hold
A few seconds
Start position. Temporary AI model demonstrating Bridge, not Dr. Goldstein. Start and movement positions are described in the instructions.

Start position

Movement position. Temporary AI model demonstrating Bridge, not Dr. Goldstein. Start and movement positions are described in the instructions.

Movement position

Exercise videoComing soon

Starting Position

Lie on your back with knees bent and feet flat, hip-width apart.

How to Do It

  1. Engage your buttock muscles and lift the hips without arching the lower back.
  2. Hold for a few seconds.
  3. Lower slowly to the surface.

What You Should Feel

Muscle work through the buttocks and trunk.

Common Mistake

Do not force the lower back into an arch.

Stop or Modify If

Stop for cramping, increasing back pain or symptoms into a leg.

Back to Exercise Menu

Core / Low Back

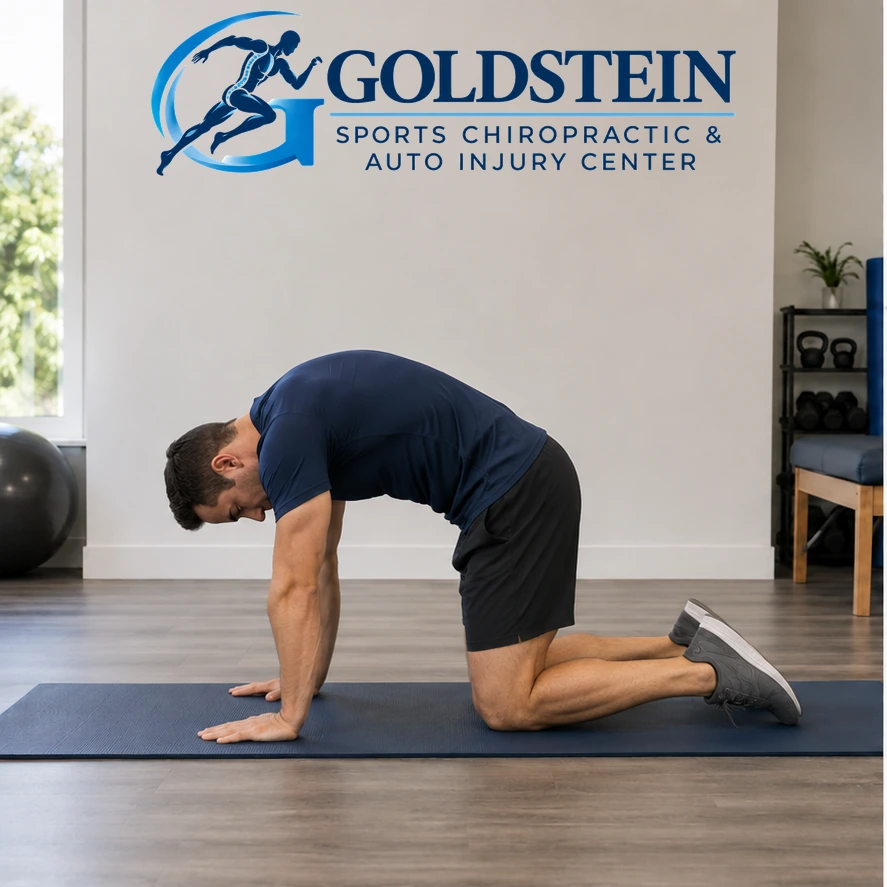
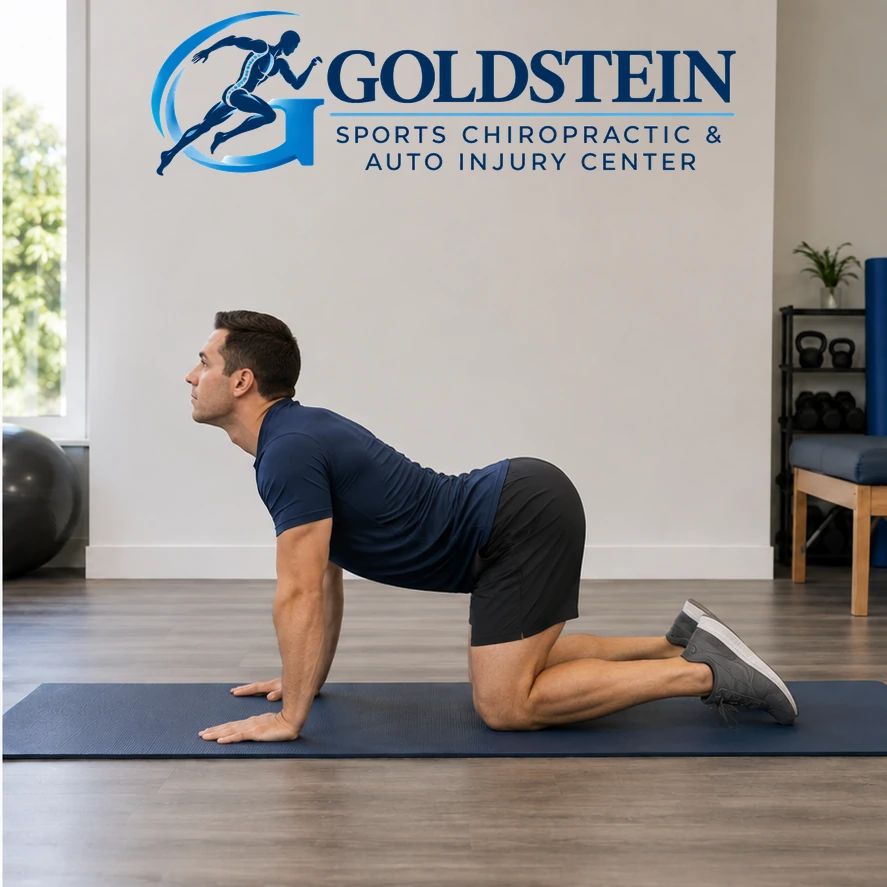
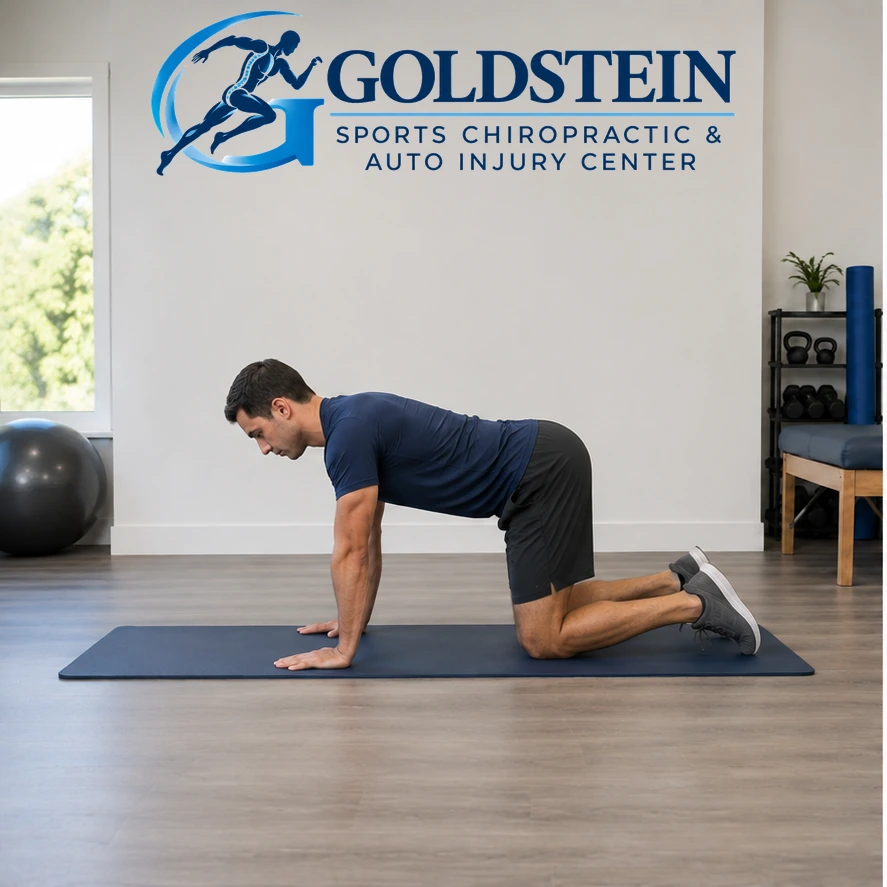
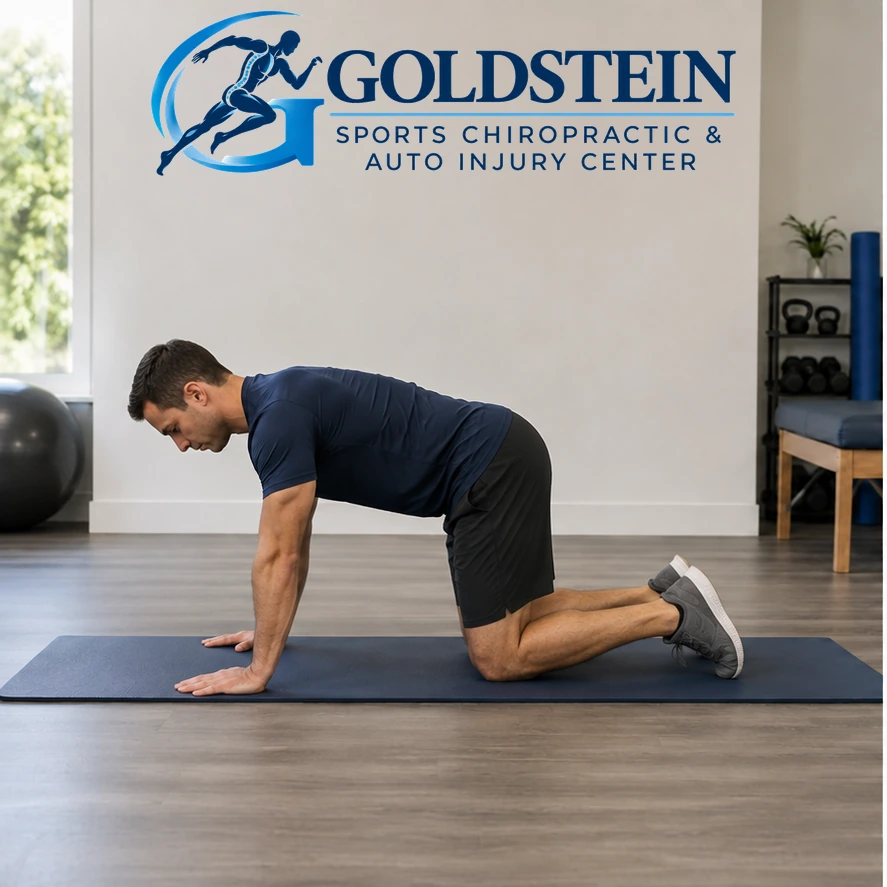
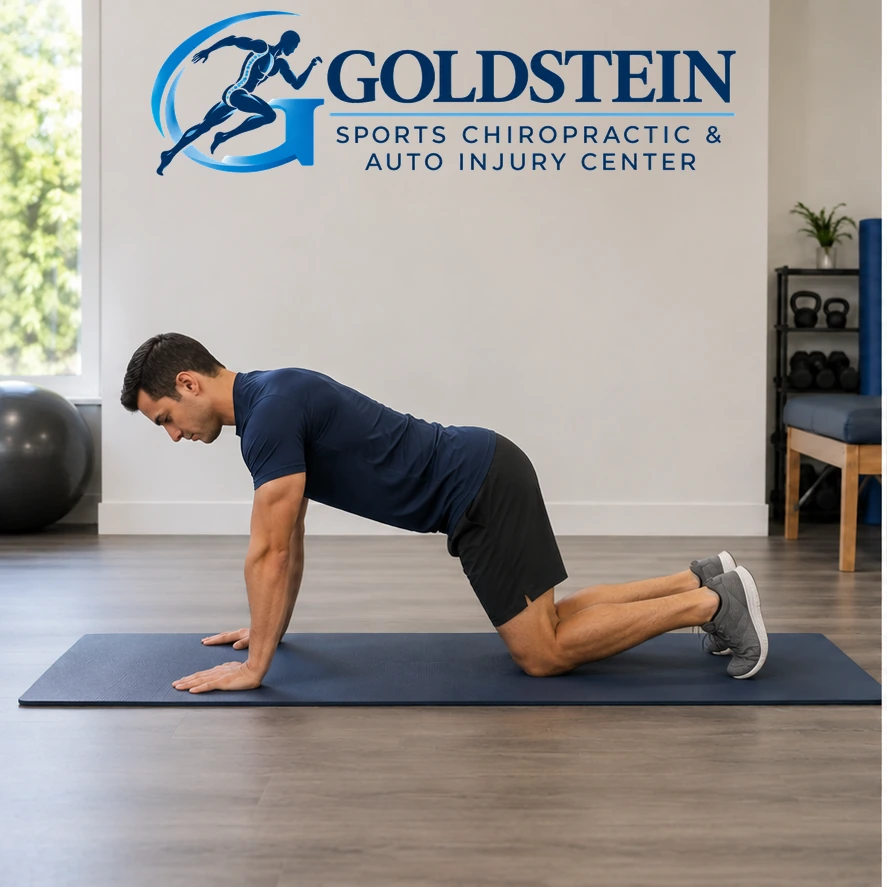
Cat-Cow Stretch

Explore controlled spinal movement.

Sets
2–3
Reps
10–15
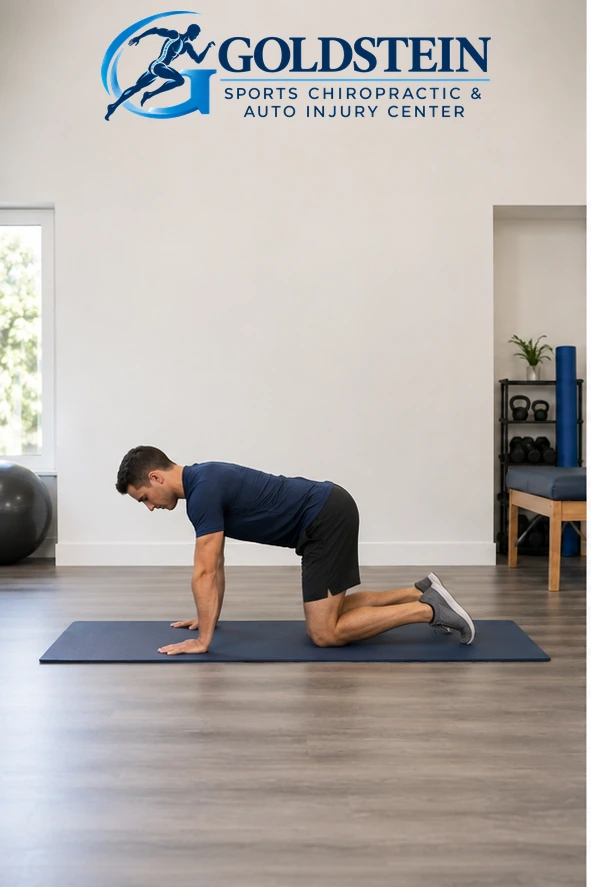
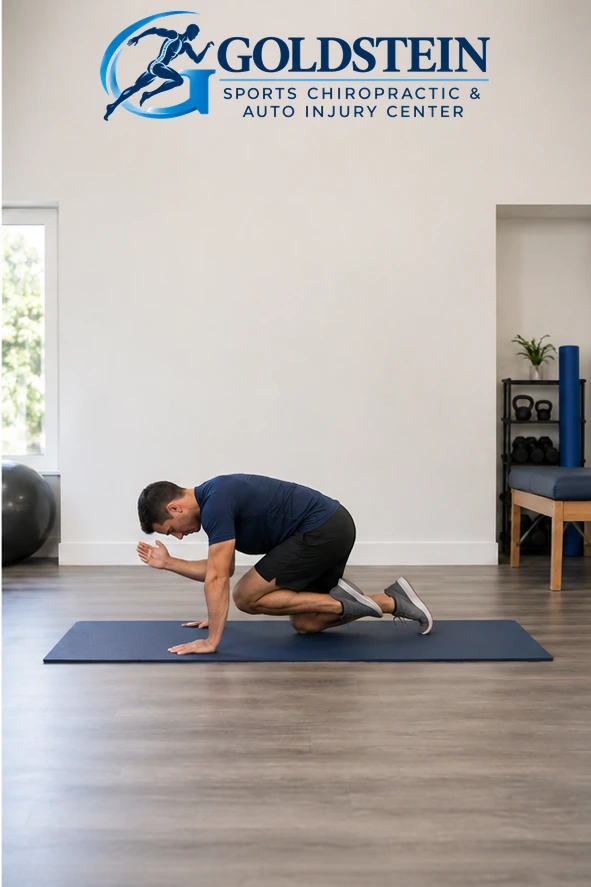
Rounded position. Temporary AI model demonstrating Cat-Cow Stretch, not Dr. Goldstein. Start and movement positions are described in the instructions.

Rounded position

Extended position. Temporary AI model demonstrating Cat-Cow Stretch, not Dr. Goldstein. Start and movement positions are described in the instructions.

Extended position

Exercise videoComing soon

Starting Position

Begin on hands and knees, hands under shoulders and knees under hips.

How to Do It

  1. Round your back toward the ceiling and ease your chin toward your chest.
  2. Then gently lower your belly and lift your head and tailbone.
  3. Alternate slowly within a comfortable range.

What You Should Feel

Gentle movement through the back.

Common Mistake

Avoid forcing either end of the movement.

Stop or Modify If

Stop for increasing back pain or symptoms into a leg.

Back to Exercise Menu

Core / Low Back

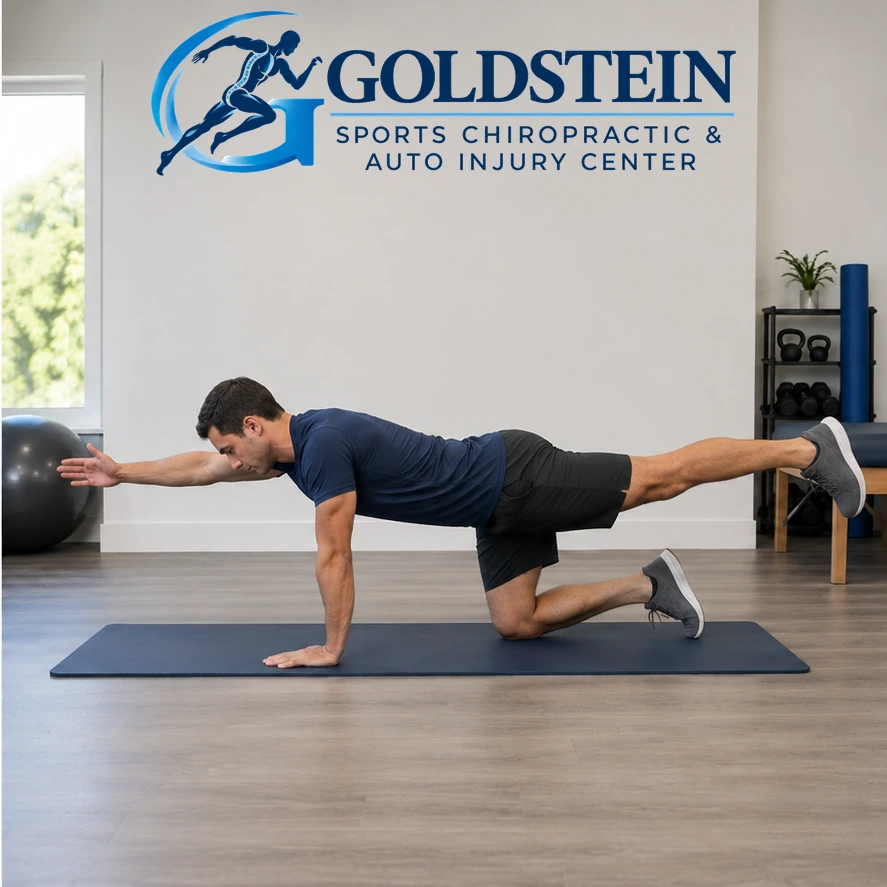
Bird Dog

Practice trunk control during opposite arm and leg movement.

Sets
3
Reps
10 each side
Hold
5 sec
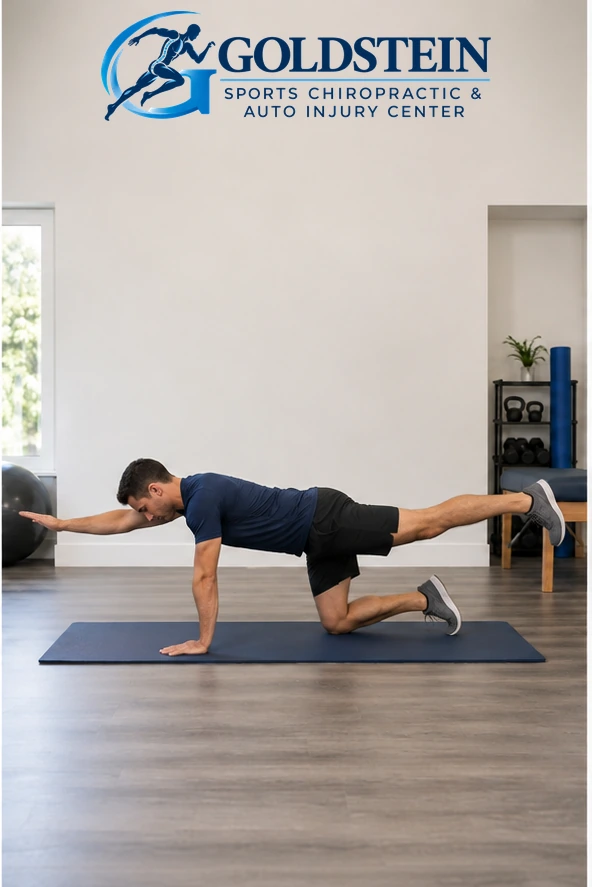
Start position. Temporary AI model demonstrating Bird Dog, not Dr. Goldstein. Start and movement positions are described in the instructions.

Start position

Movement position. Temporary AI model demonstrating Bird Dog, not Dr. Goldstein. Start and movement positions are described in the instructions.

Movement position

Exercise videoComing soon

Starting Position

Begin on hands and knees, hands under shoulders and knees under hips.

How to Do It

  1. Reach one arm forward and the opposite leg backward, keeping the back controlled.
  2. Hold for a few seconds.
  3. Return, then repeat on the opposite side.

What You Should Feel

Controlled effort through the trunk and hips.

Common Mistake

Avoid twisting or arching the lower back.

Stop or Modify If

Stop for increasing symptoms or loss of balance.

Back to Exercise Menu

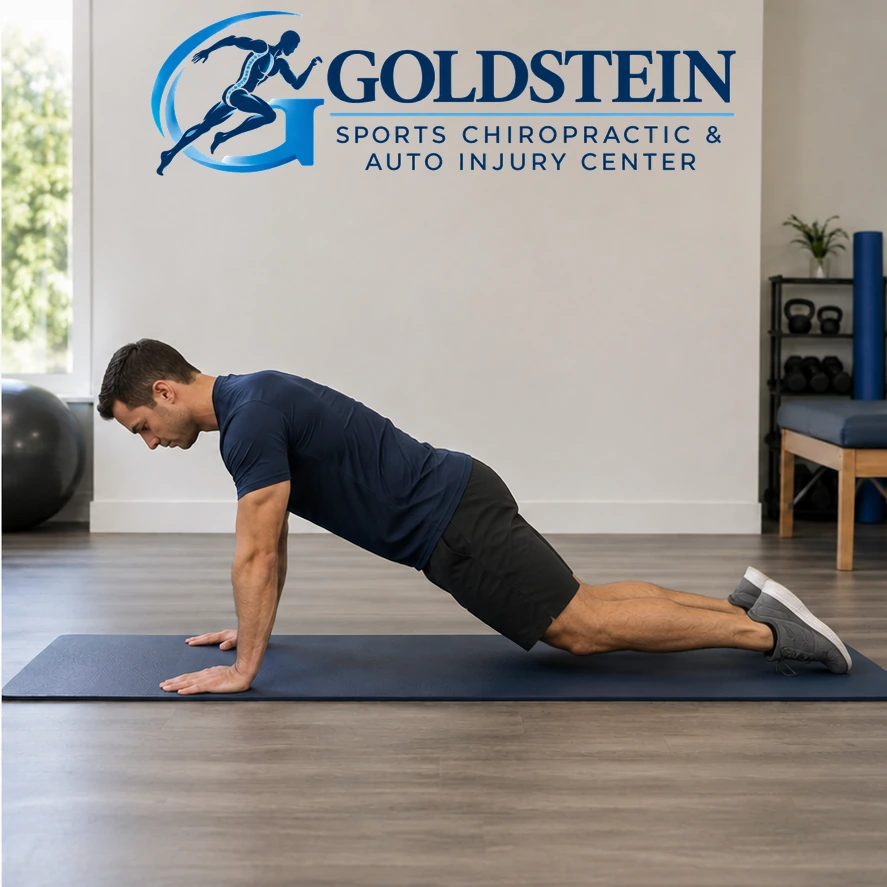
Core / Low Back · Start here · Easier option

Knees-Down Plank

Practice supported trunk control.

Hold
10–30 sec
Repeats
3–5
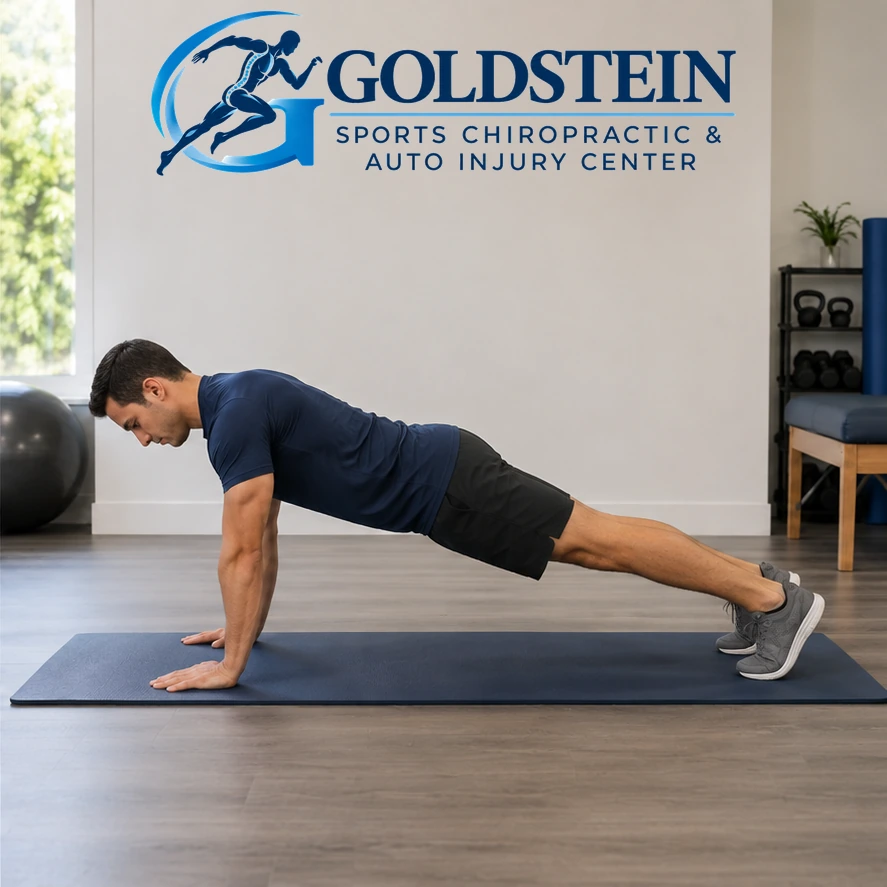
Start position. Temporary AI model demonstrating the knees-down plank option, not Dr. Goldstein.

Start position

Movement position. Temporary AI model demonstrating the knees-down plank option, not Dr. Goldstein.

Movement position

Exercise videoComing soon

Starting Position

Begin on hands and knees with hands below shoulders.

How to Do It

  1. Keep the knees on the surface and move into a straight line from shoulders through hips to knees.
  2. Hold with your weight over your hands.
  3. Release back to the starting position.

What You Should Feel

Abdominal and shoulder muscle effort.

Common Mistake

Avoid holding your breath.

Stop or Modify If

Stop for wrist, shoulder or back pain or inability to hold the position comfortably.

Back to Exercise Menu

Core / Low Back · Progression · Legs extended

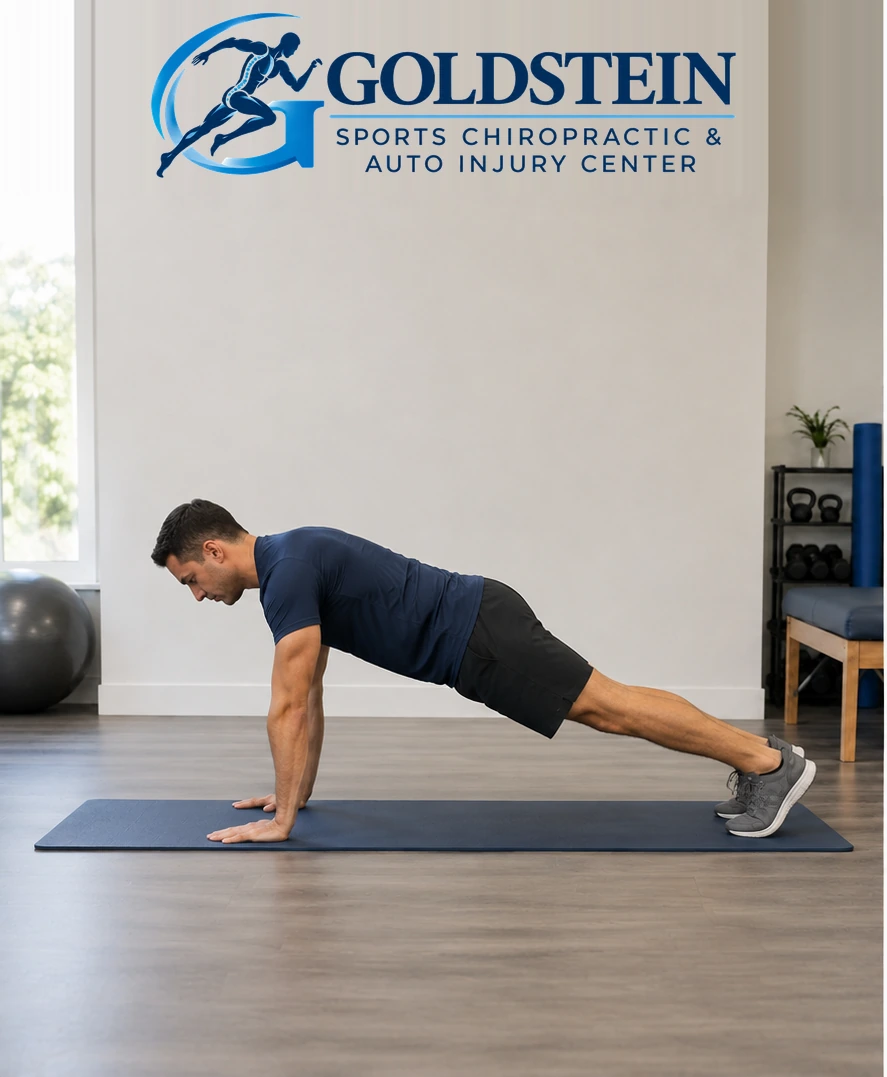
Plank

Practice supported trunk control.

Hold
10–30 sec
Repeats
3–5
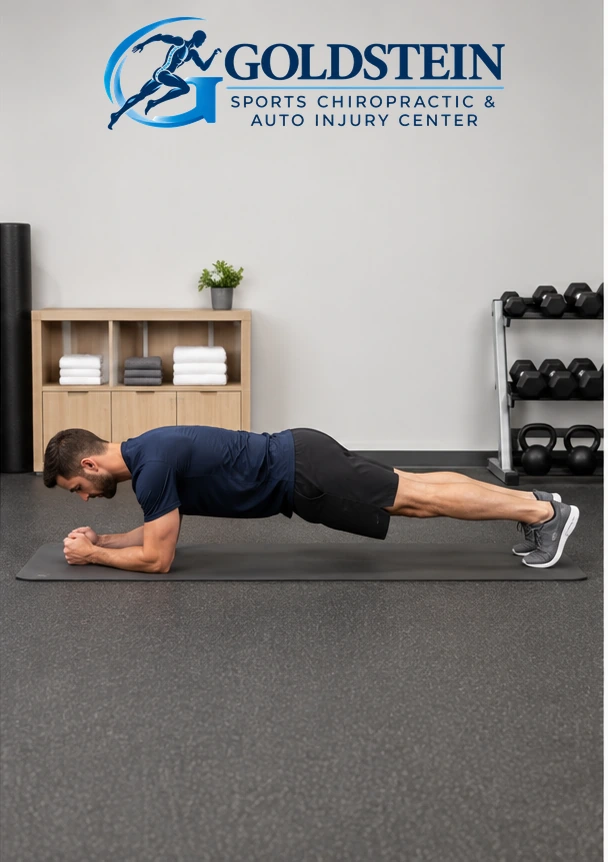
Start position. Temporary AI model demonstrating Plank, not Dr. Goldstein. Start and movement positions are described in the instructions.

Start position

Movement position. Temporary AI model demonstrating Plank, not Dr. Goldstein. Start and movement positions are described in the instructions.

Movement position

Exercise videoComing soon

Starting Position

Begin on hands and knees with hands below shoulders.

How to Do It

  1. Straighten the legs behind you with feet hip-width apart.
  2. Engage the trunk and hold without sagging.
  3. Return to the knees to release.

What You Should Feel

Abdominal and shoulder muscle effort.

Common Mistake

Avoid holding your breath.

Stop or Modify If

Stop for wrist, shoulder or back pain or inability to hold the position comfortably.

Back to Exercise Menu

Core / Low Back · Progression

Bird Dog with Elbow to Knee

Practice a moving progression of opposite arm and leg control.

Sets
1 to start
Reps
8–12 each side
Start. Temporary AI model demonstrating Bird Dog with Elbow to Knee, not Dr. Goldstein. Start and movement positions are described in the instructions.

Start

Opposite reach. Temporary AI model demonstrating Bird Dog with Elbow to Knee, not Dr. Goldstein. Start and movement positions are described in the instructions.

Opposite reach

Elbow toward knee. Temporary AI model demonstrating Bird Dog with Elbow to Knee, not Dr. Goldstein. Start and movement positions are described in the instructions.

Elbow toward knee

Exercise videoComing soon

Starting Position

Begin on hands and knees, hands below shoulders and knees below hips.

How to Do It

  1. Reach one arm to shoulder height and the opposite leg to hip height.
  2. Engage the trunk, buttock and thigh muscles, drawing the toes toward the shin as demonstrated.
  3. Bring the opposite elbow and knee toward each other, then return to the start.
  4. Repeat on the opposite side.

What You Should Feel

Controlled trunk, arm and hip muscle effort.

Common Mistake

Avoid moving quickly or holding your breath.

Stop or Modify If

Stop for increasing pain, new leg symptoms or loss of balance.

Back to Exercise Menu

Core / Low Back

Dead Bug

Practice trunk control while opposite limbs move.

Sets
1–2 as tolerated
Reps
8–12 each side
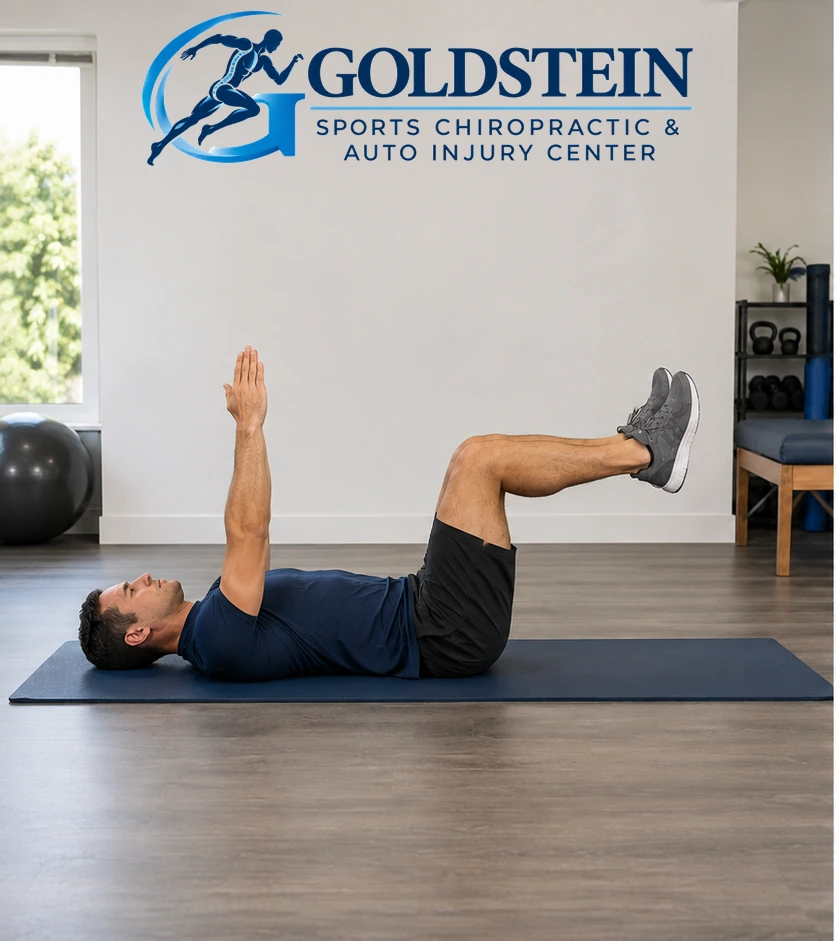
Start position. Temporary AI model demonstrating Dead Bug, not Dr. Goldstein. Start and movement positions are described in the instructions.

Start position

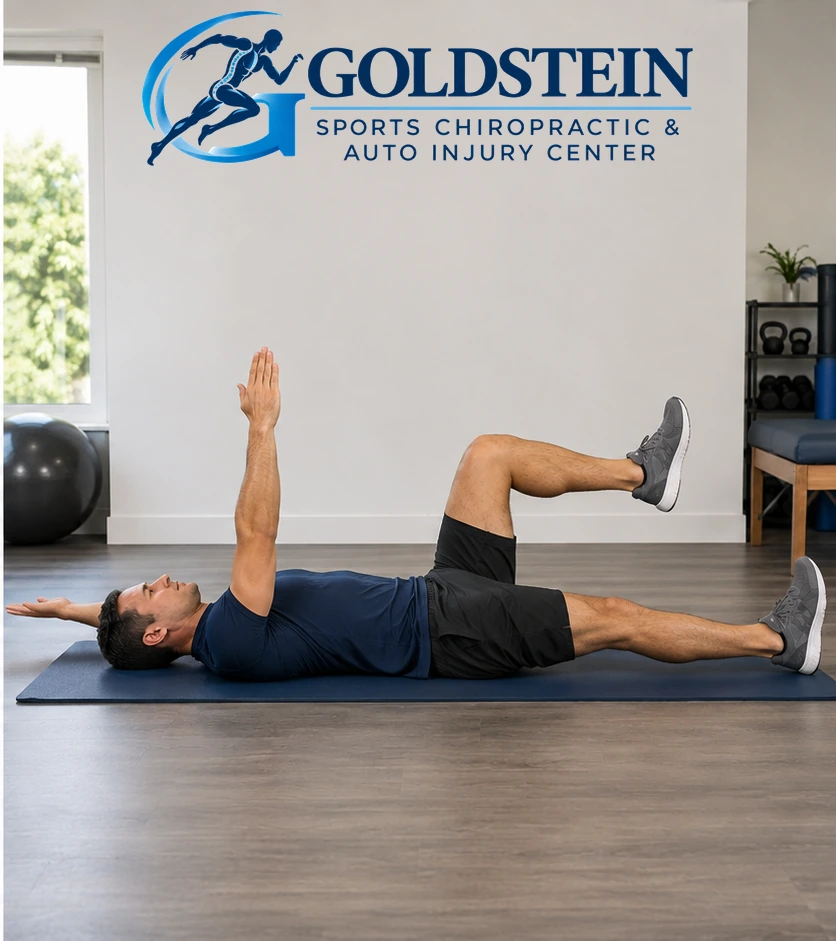
Movement position. Temporary AI model demonstrating Dead Bug, not Dr. Goldstein. Start and movement positions are described in the instructions.

Movement position

Exercise videoComing soon

Starting Position

Lie on your back with knees bent and feet lifted. Raise arms toward the ceiling.

How to Do It

  1. Gently brace the abdomen and keep the lower back against the surface.
  2. Slowly lower one arm overhead while straightening the opposite leg toward the floor.
  3. Return before losing back control.
  4. Repeat on the opposite side.

What You Should Feel

Controlled abdominal effort.

Common Mistake

Do not lower farther than you can control.

Stop or Modify If

Stop if back or leg symptoms increase.

Back to Exercise Menu

Core / Low Back

Prone Forearm Prop

Explore a selected back-extension movement.

Hold
30 sec
Reps
6–8
Frequency
3–4 times daily
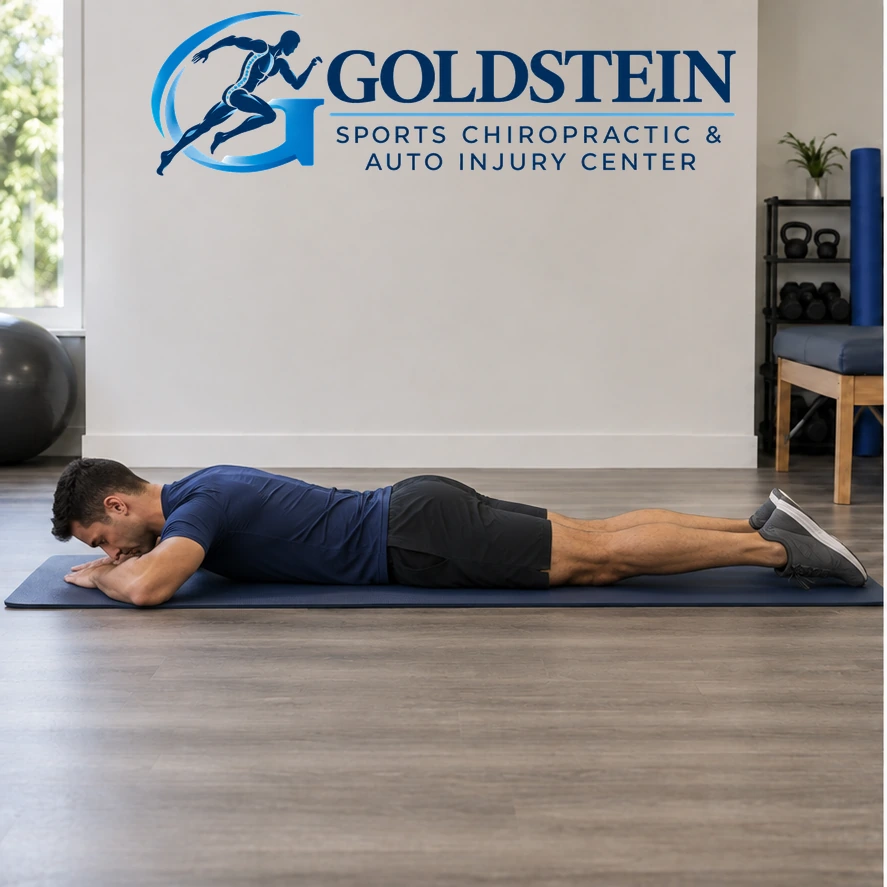
Start position. Temporary AI model demonstrating Prone Forearm Prop, not Dr. Goldstein. Start and movement positions are described in the instructions.

Start position

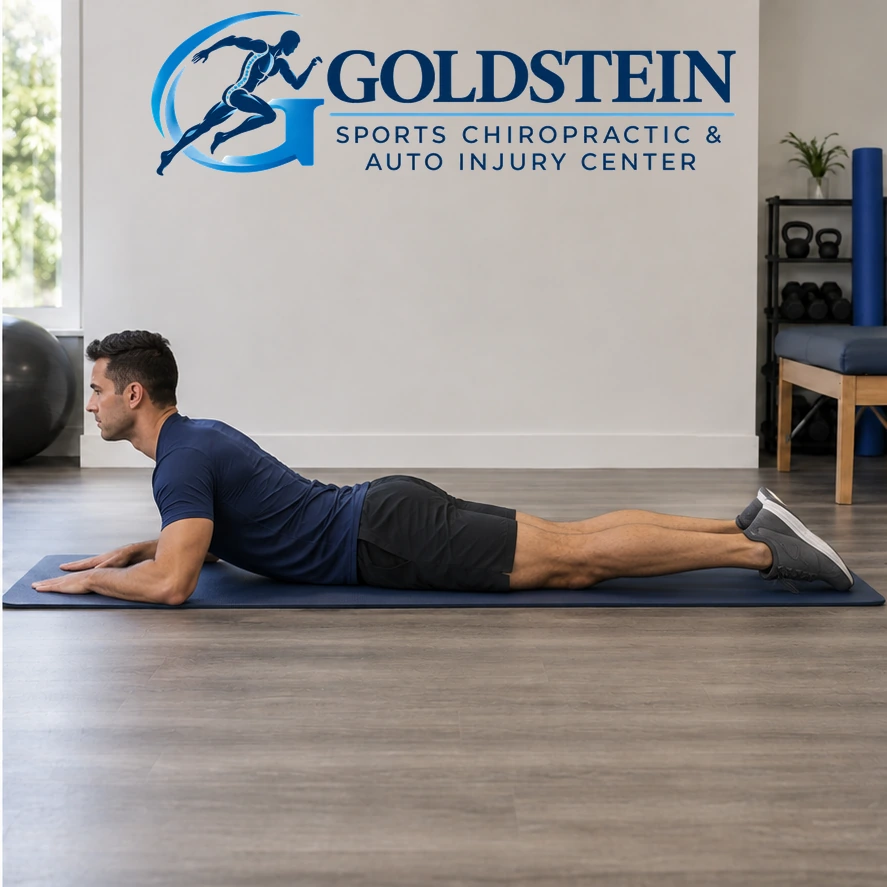
Movement position. Temporary AI model demonstrating Prone Forearm Prop, not Dr. Goldstein. Start and movement positions are described in the instructions.

Movement position

Exercise videoComing soon

Starting Position

Lie face down on a comfortable firm surface. Use this directional exercise only if it was selected for you during care.

How to Do It

  1. Slowly prop the upper body onto the forearms.
  2. Keep the hips and pelvis on the surface, with the buttocks relaxed and neck comfortable.
  3. Hold, then lower slowly.

What You Should Feel

Gentle back movement; symptoms should not spread farther down the leg.

Stop or Modify If

Stop if pain travels farther down a leg, increases or is accompanied by new neurological symptoms.

Back to Exercise Menu

Core / Low Back

Sciatica Nerve Flossing

Practice a selected, controlled leg-and-ankle movement.

Sets
1–2 as tolerated
Reps
10–15 on the selected side
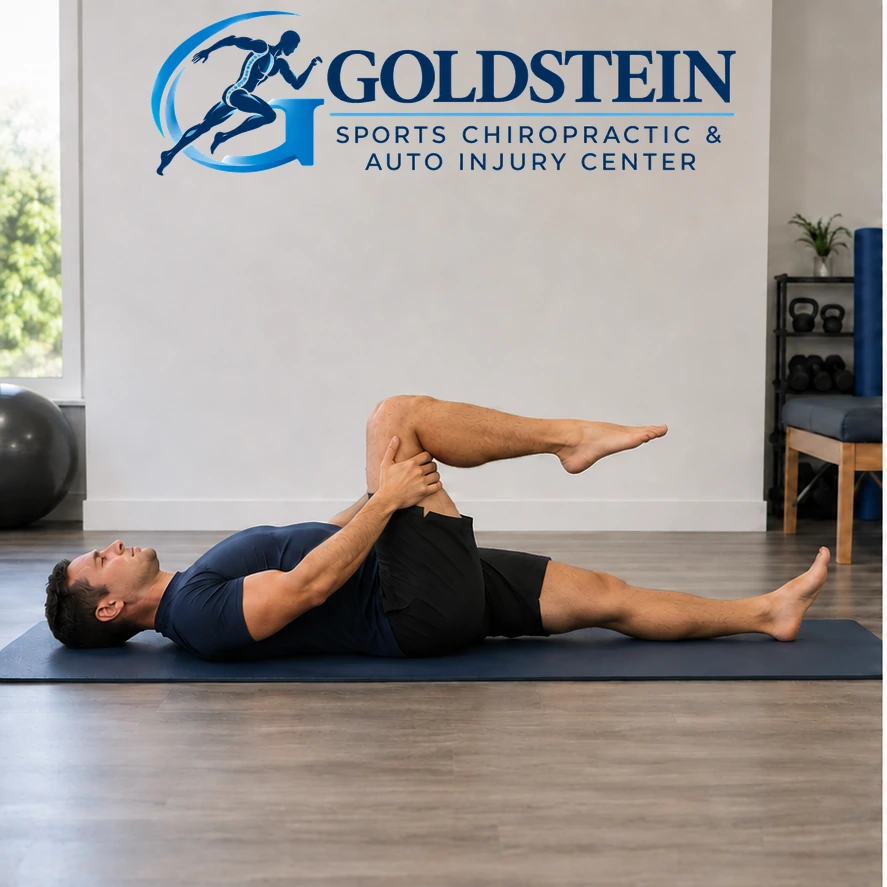
Start position. Temporary AI model demonstrating Sciatica Nerve Flossing, not Dr. Goldstein. Start and movement positions are described in the instructions.

Start position

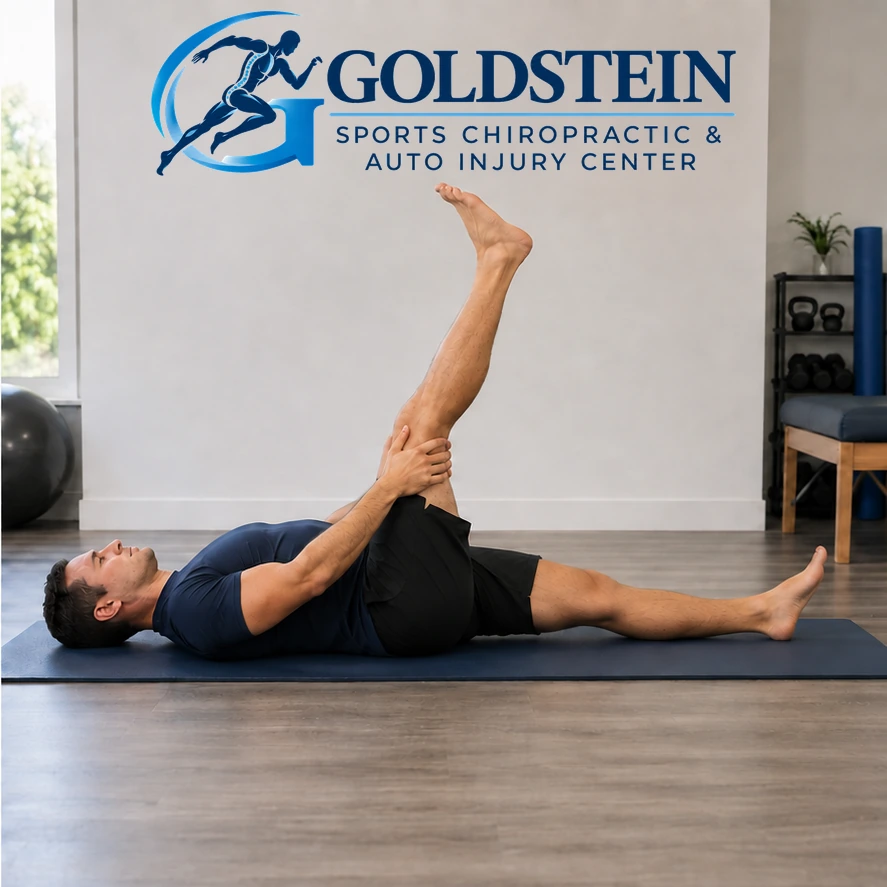
Movement position. Temporary AI model demonstrating Sciatica Nerve Flossing, not Dr. Goldstein. Start and movement positions are described in the instructions.

Movement position

Exercise videoComing soon

Starting Position

Lie on your back with one leg straight on the surface. Bend the selected leg toward your chest and support behind the thigh without forcing.

How to Do It

  1. Slowly straighten that knee while drawing the toes gently toward your head.
  2. Bend the knee again while pointing the toes away.
  3. Move smoothly within tolerance. Repeat on the opposite side only if instructed.

What You Should Feel

Gentle controlled movement, not a forced stretch or reproduced nerve pain.

Stop or Modify If

Stop if symptoms increase or become sharp, or new numbness or weakness occurs.

Back to Exercise Menu

Core / Low Back

Back Smash · Pelvic-Tilt Feedback

Practice controlled movement within your selected range.

Sets
3
Reps
10
Hold
5 sec
Start position. Temporary AI demonstration of Back Smash · Pelvic-Tilt Feedback; anonymous model, not Dr. Goldstein or a patient.

Start position

Movement position. Temporary AI demonstration of Back Smash · Pelvic-Tilt Feedback; anonymous model, not Dr. Goldstein or a patient.

Movement position

Exercise videoComing soon

Starting Position

Lie on your back with a hand under the lower back.

How to Do It

  1. Gently flatten the lower back into your hand.
  2. Hold, then release.

What You Should Feel

Controlled muscle effort or a gentle stretch, without pain.

Stop or Modify If

Stop for sharp or increasing pain, new numbness, tingling or weakness.

Back to Exercise Menu

Core / Low Back

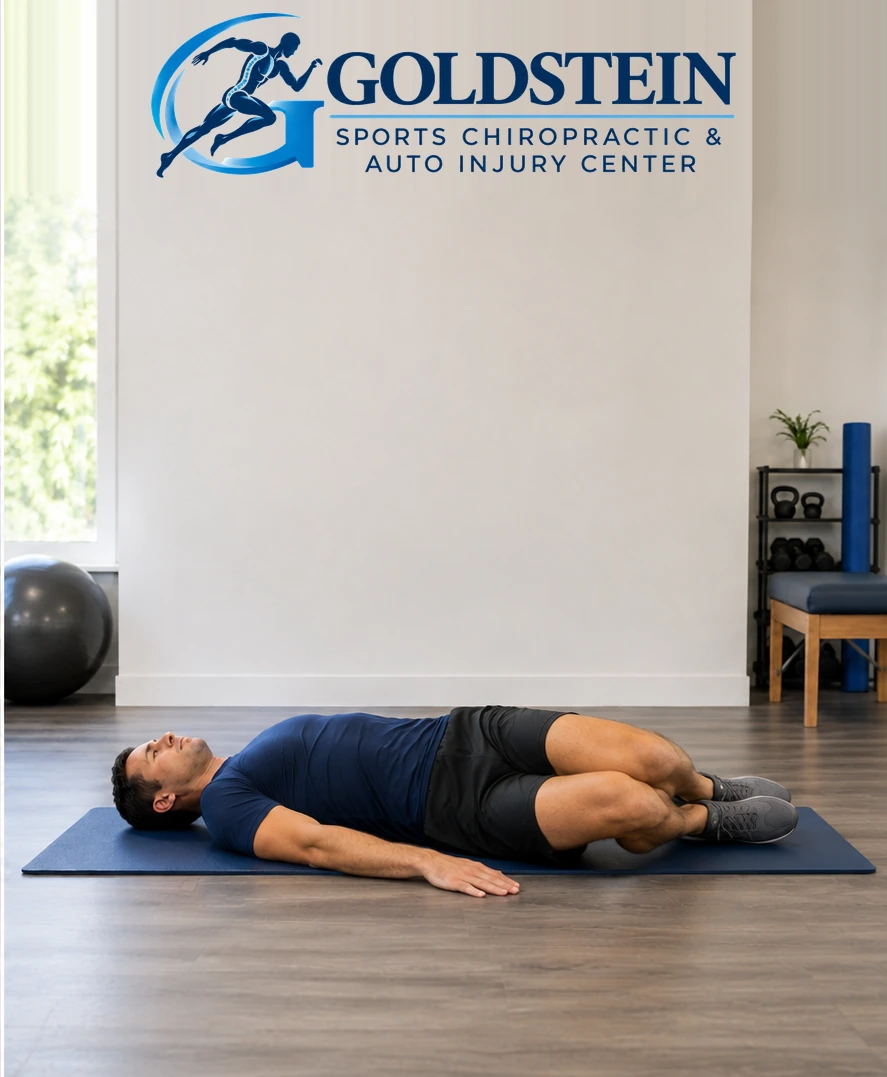
Side-to-Side Knee Movement

Practice controlled movement within your selected range.

Sets
1
Reps
10 each side
Start position. Temporary AI demonstration of Side-to-Side Knee Movement; anonymous model, not Dr. Goldstein or a patient.

Start position

Movement position. Temporary AI demonstration of Side-to-Side Knee Movement; anonymous model, not Dr. Goldstein or a patient.

Movement position

Exercise videoComing soon

Starting Position

Lie on your back with knees bent and feet on the floor.

How to Do It

  1. Move the bent knees to one side while keeping the feet on the floor.
  2. Return through center, then move to the other side.

What You Should Feel

Controlled muscle effort or a gentle stretch, without pain.

Stop or Modify If

Stop for sharp or increasing pain, new numbness, tingling or weakness.

Back to Exercise Menu

Core / Low Back

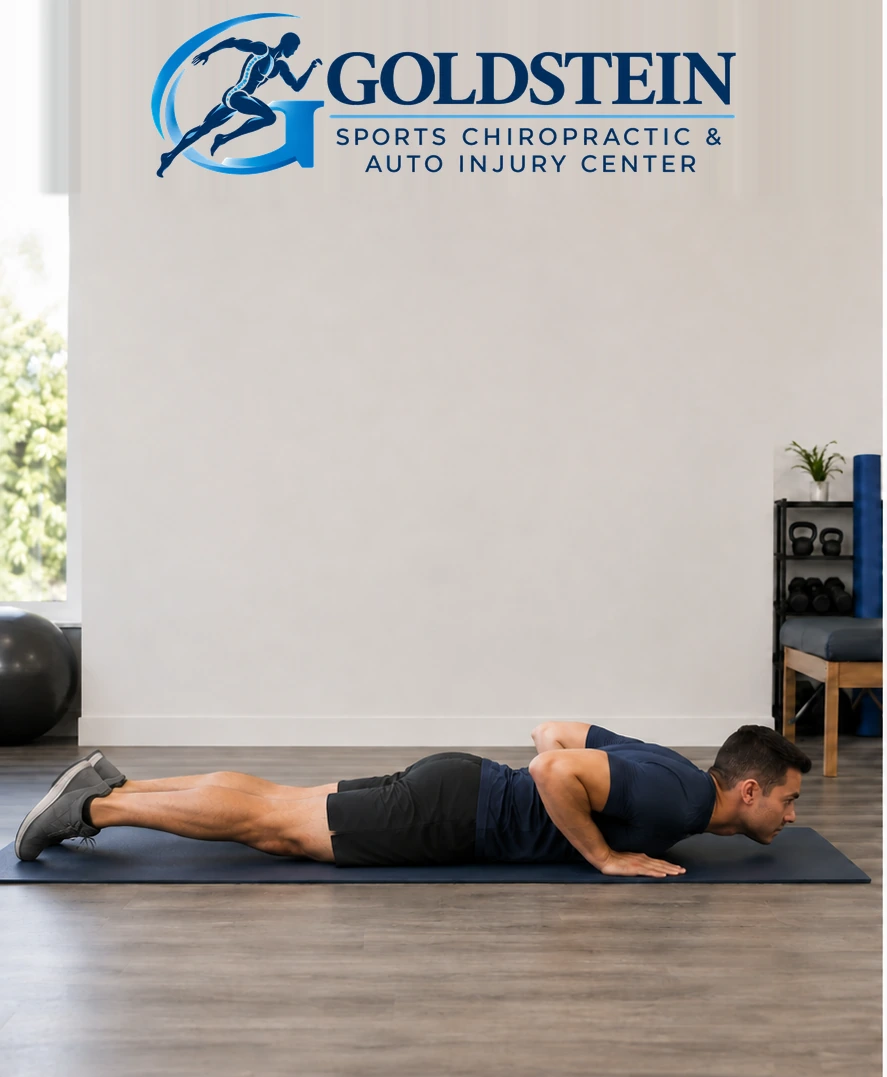
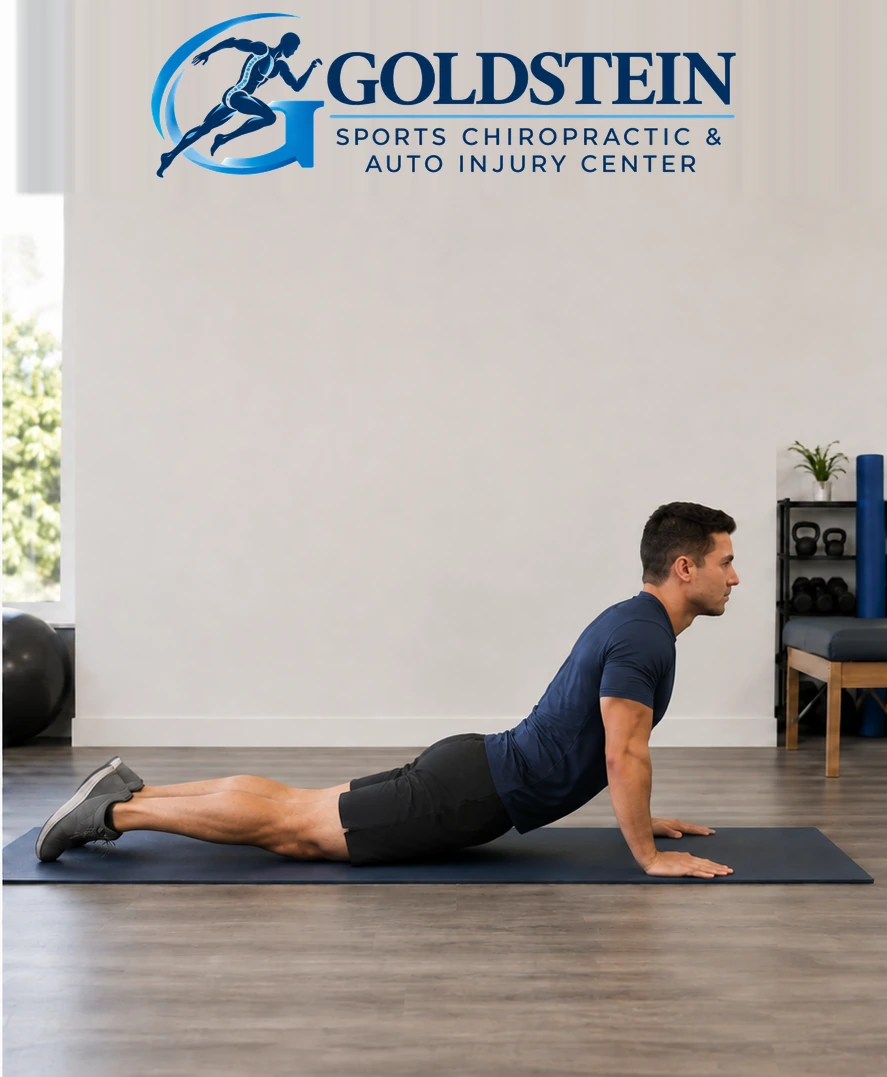
Cobra · Straight-Arm Press-Up

Review the extension movement selected during care.

Sets
3
Hold
30 sec
Start position. Temporary AI demonstration of Cobra · Straight-Arm Press-Up; anonymous model, not Dr. Goldstein or a patient.

Start position

Movement position. Temporary AI demonstration of Cobra · Straight-Arm Press-Up; anonymous model, not Dr. Goldstein or a patient.

Movement position

Exercise videoComing soon

Starting Position

Lie on your front with hands near the shoulders.

How to Do It

  1. Press the upper body upward while keeping the pelvis and hips down.
  2. Hold within your selected range, then lower.

What You Should Feel

Controlled movement within your comfortable range.

Stop or Modify If

Stop if pain increases or spreads farther down a leg, or numbness or weakness develops.

Back to Exercise Menu

Core / Low Back

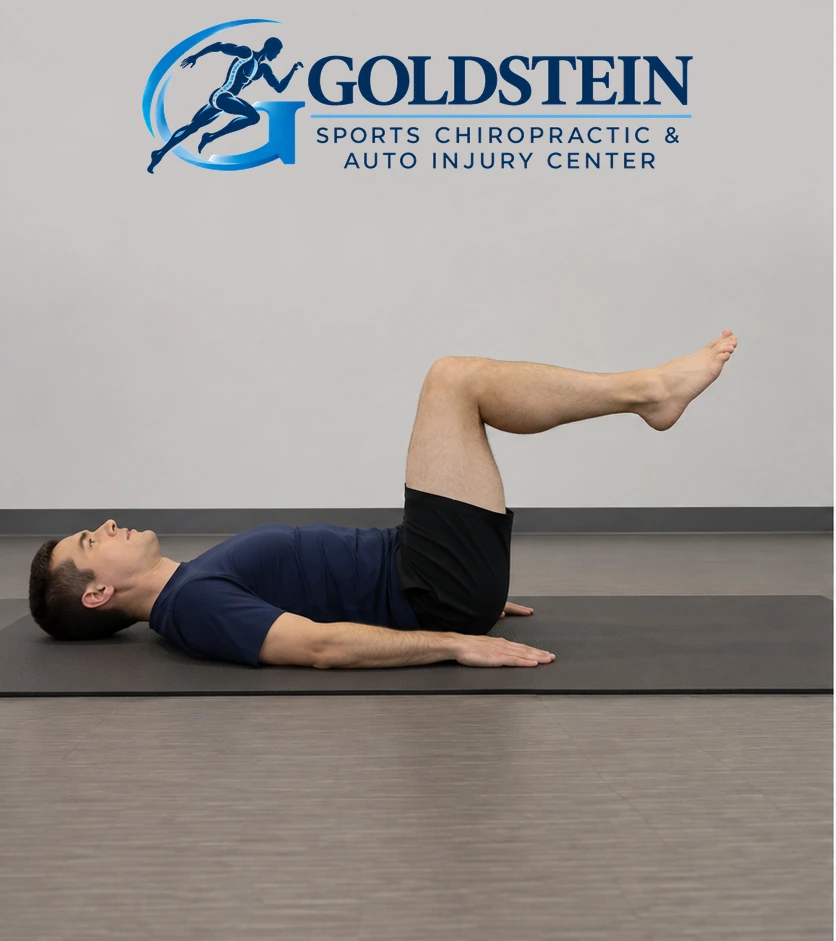
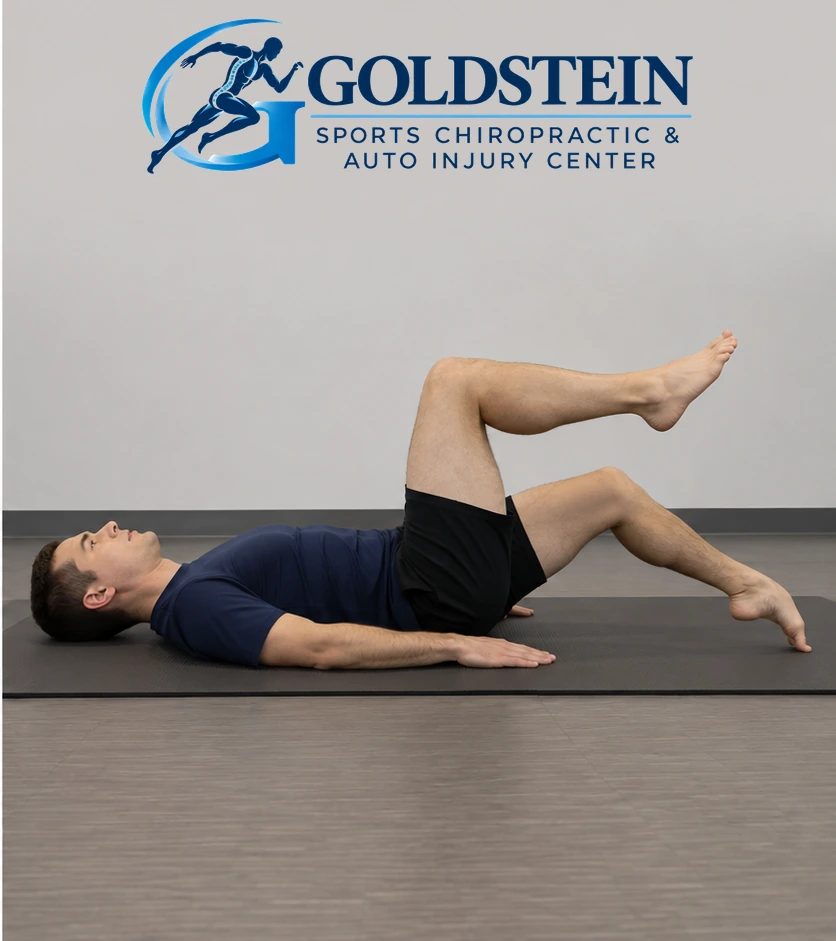
Supine Toe Tap

Practice controlled movement within your selected range.

Sets
1
Reps
8–12 each side
Tabletop. Temporary AI demonstration of Supine Toe Tap; anonymous model, not Dr. Goldstein or a patient.

Tabletop

Toes touch — heel lifted. Temporary AI demonstration of Supine Toe Tap; anonymous model, not Dr. Goldstein or a patient.

Toes touch — heel lifted

Exercise videoComing soon

Starting Position

Lie on your back with hips and knees bent to 90 degrees, hands by your sides.

How to Do It

  1. Lower one leg under control until only the toes lightly touch the floor; keep the heel lifted and the other leg controlled in tabletop.
  2. Return to tabletop, then alternate sides.

What You Should Feel

Controlled muscle effort or a gentle stretch, without pain.

Stop or Modify If

Stop for sharp or increasing pain, new numbness, tingling or weakness.

Back to Exercise Menu

Core / Low Back

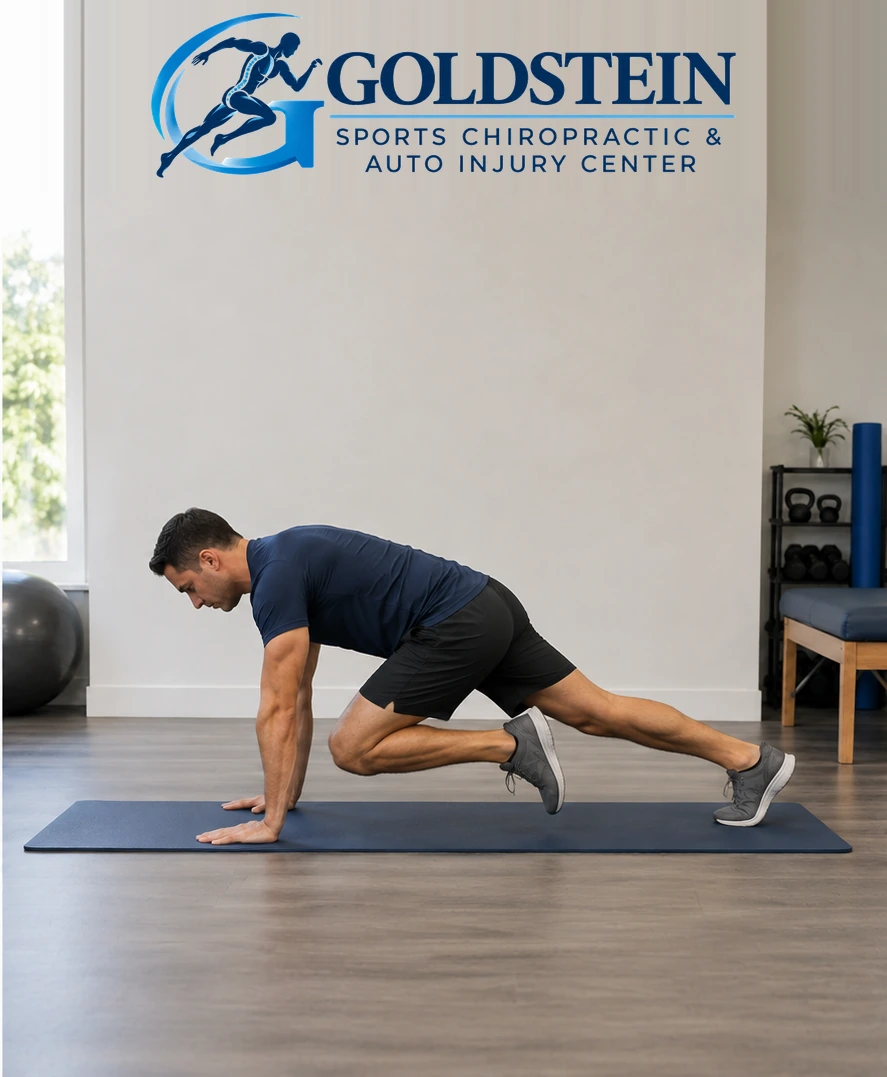
Mountain Climber

Practice controlled movement within your selected range.

Sets
2
Reps
8–12 each side
Start position. Temporary AI demonstration of Mountain Climber; anonymous model, not Dr. Goldstein or a patient.

Start position

Movement position. Temporary AI demonstration of Mountain Climber; anonymous model, not Dr. Goldstein or a patient.

Movement position

Exercise videoComing soon

Starting Position

Begin in a hands-supported plank with the trunk controlled.

How to Do It

  1. Bring one knee toward your chest without losing trunk control.
  2. Return that leg and repeat with the other leg.

What You Should Feel

Controlled muscle effort or a gentle stretch, without pain.

Stop or Modify If

Stop for sharp or increasing pain, new numbness, tingling or weakness.

Back to Exercise Menu

Core / Low Back

McGill Curl-Up

Practice controlled movement within your selected range.

Reps
3 each side
Hold
15 sec

Exercise pictures

Follow the written steps below. A reviewed visual demonstration will be added here.

Exercise videoComing soon

Starting Position

Lie on your back with one knee bent and that foot flat, and the other leg straight on the floor. Place your hands beneath the natural lower-back curve.

How to Do It

  1. Brace your abdomen and lift your elbows slightly. Keep the natural lower-back curve; do not press it flat.
  2. Lift your head and shoulders slightly together, keeping your neck neutral and the straight-leg heel on the floor.
  3. Breathe normally during the 15-second hold, then lower slowly. Complete 3 holds, switch which knee is bent, and repeat.

What You Should Feel

Controlled muscle effort or a gentle stretch, without pain.

Stop or Modify If

Stop for sharp or increasing pain, new numbness, tingling or weakness.

Back to Exercise Menu

Core / Low Back

Standing Lumbar Extension

Practice controlled movement within your selected range.

Reps
3
Hold
30 sec
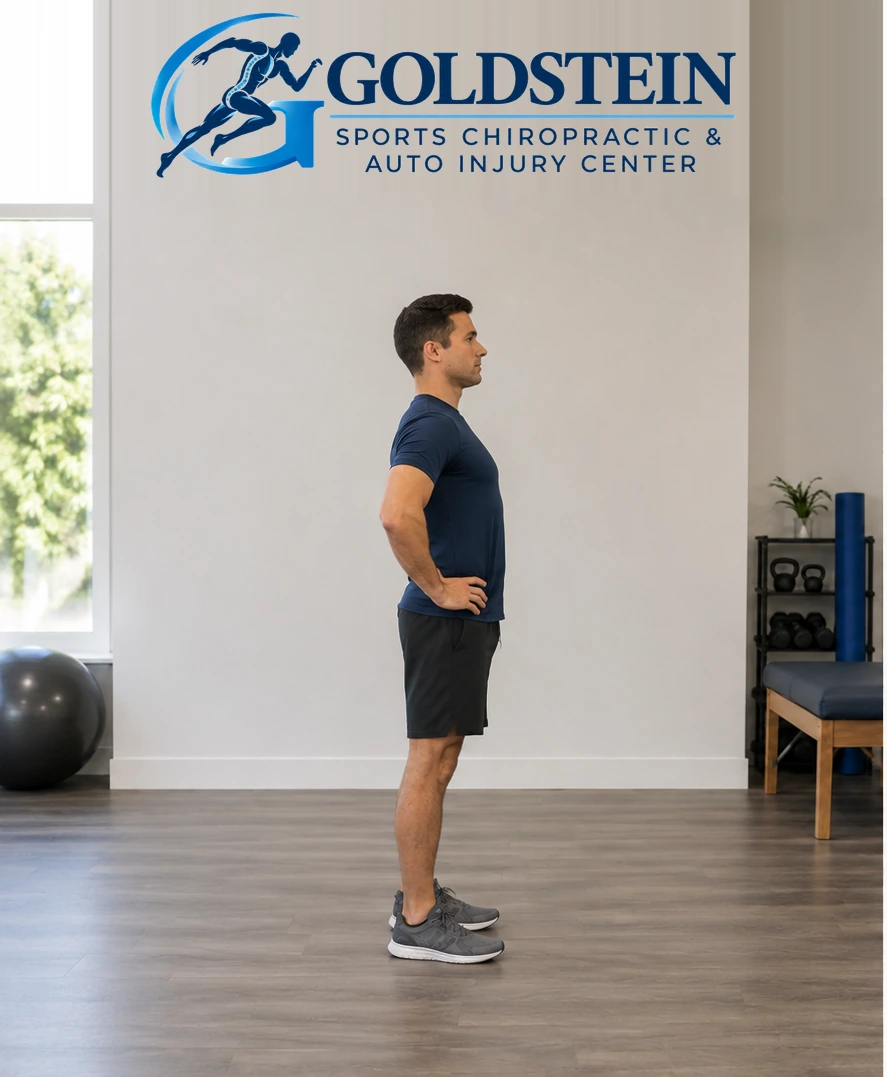
Start position. Temporary AI demonstration of Standing Lumbar Extension; anonymous model, not Dr. Goldstein or a patient.

Start position

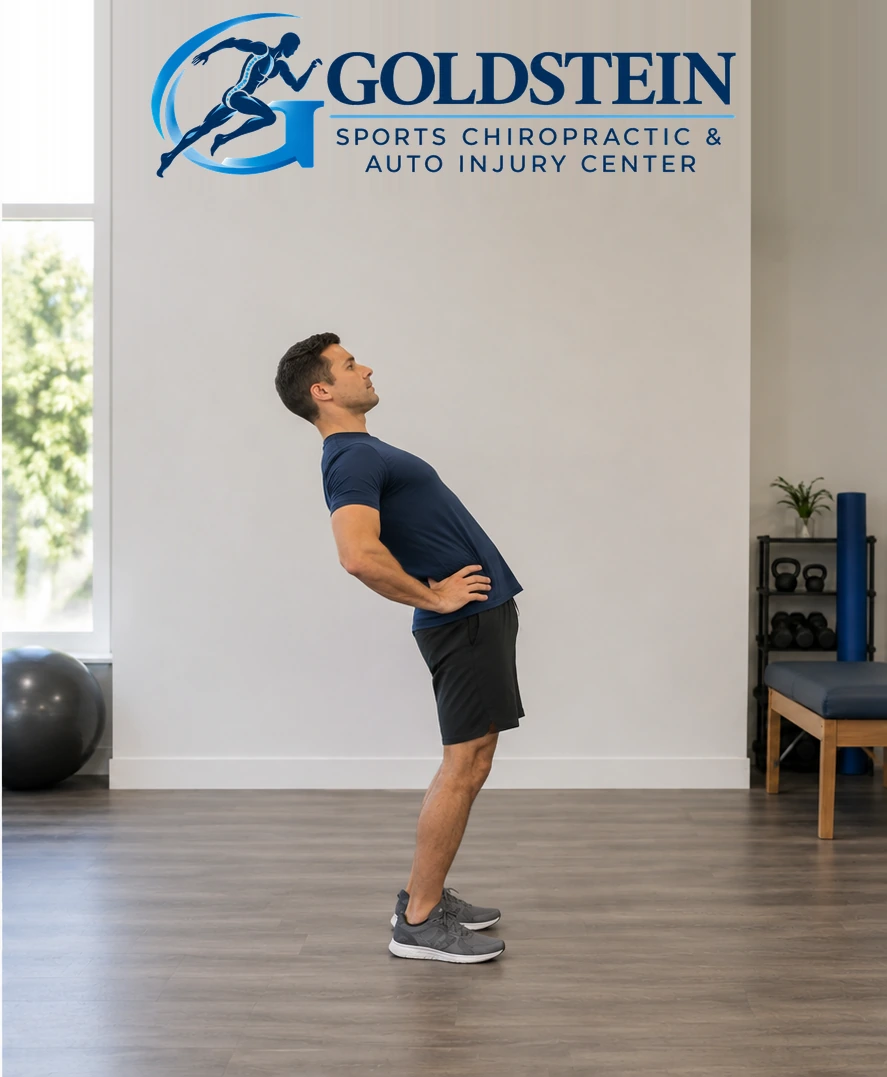
Movement position. Temporary AI demonstration of Standing Lumbar Extension; anonymous model, not Dr. Goldstein or a patient.

Movement position

Exercise videoComing soon

Starting Position

Stand upright with hands on the hips or lower back.

How to Do It

  1. Lean backward gently within the range shown during care.
  2. Hold, then return upright.

What You Should Feel

Controlled muscle effort or a gentle stretch, without pain.

Stop or Modify If

Stop for sharp or increasing pain, new numbness, tingling or weakness.

Back to Exercise Menu

Core / Low Back

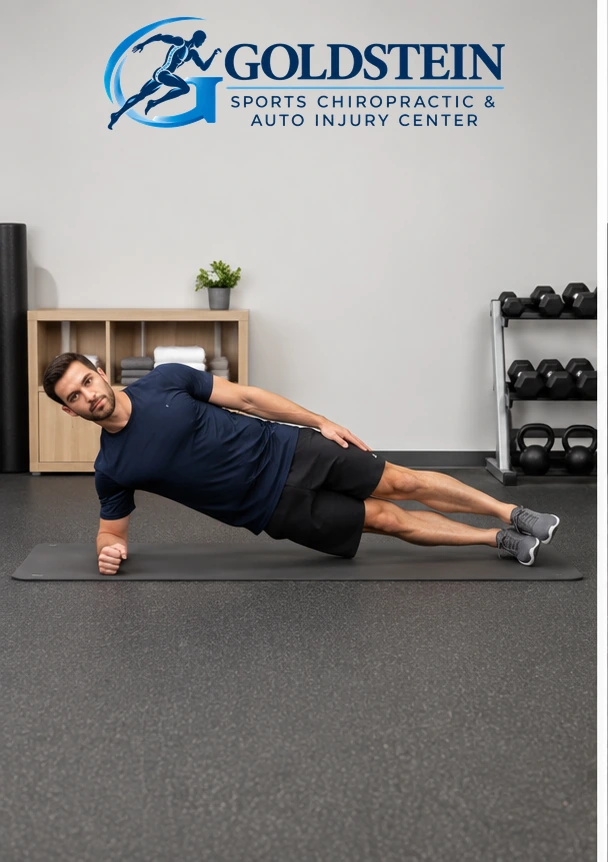
Side Plank with Side-to-Side Rotation

Practice controlled movement within your selected range.

Sets
1
Reps
10 rotations
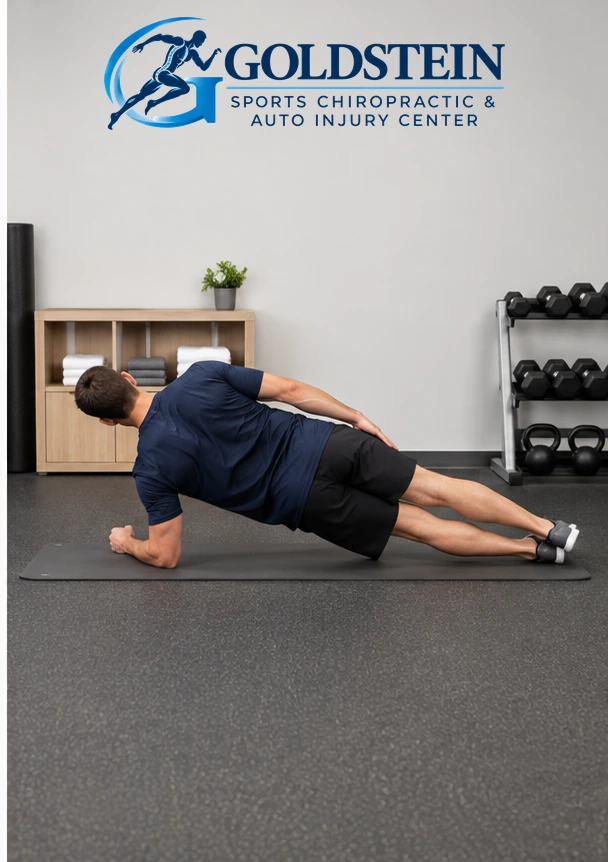
Side A plank. Temporary AI demonstration of Side Plank with Side-to-Side Rotation; anonymous model, not Dr. Goldstein or a patient.

Side A plank

Controlled transition. Temporary AI demonstration of Side Plank with Side-to-Side Rotation; anonymous model, not Dr. Goldstein or a patient.

Controlled transition

Side B plank. Temporary AI demonstration of Side Plank with Side-to-Side Rotation; anonymous model, not Dr. Goldstein or a patient.

Side B plank

Exercise videoComing soon

Starting Position

Start in the side-plank support position shown during care.

How to Do It

  1. Rotate through to finish with the opposite side down in a side plank.
  2. Reverse the movement with control. This is not a thread-the-needle.

What You Should Feel

Controlled muscle effort or a gentle stretch, without pain.

Stop or Modify If

Stop for sharp or increasing pain, new numbness, tingling or weakness.

Back to Exercise Menu

Medical Information & Sources

These movement reminders do not diagnose a condition or replace an evaluation, personalized rehabilitation plan or emergency care. Dosage reflects the office’s legacy exercise materials and Dr. Goldstein’s clarifications; it is not a recommendation to complete every movement.

Questions about your exercises?

Questions About an Exercise?

Ask which movements, range and repetitions are right for you. Follow the guidance provided during your care.